Azure Container Instances, Azure Functions & VSTS Builds
Table of Contents
Today, we are once again talking about builds, and pushing for more automation in your software creation process. Before we get started, make sure that you have the following pre-requisites handy:
- A Visual Studio Team Services account. Those are free.
- An Azure account. Those can be free for trial (1).
- Installed Docker.
- Installed Azure CLI.
Pretty much all of the code and descriptions described below can be followed on macOS, Windows or Linux, as most of them will be done within the web interface, through your favorite web browser.
And in case you are new to this, some definitions you might want to keep in mind:
- Agent Pool
- A virtual grouping of build agents.
- Agent Queue
- A queue of build agents that are running or waiting to run existing builds.
What are we doing #
The big thing that was announced recently from the good folks in the Azure org is Azure Container Instances (or for short - ACI). In the words of Corey Sanders:
An Azure Container Instance is a single container that starts in seconds and is billed by the second. ACI offer highly versatile sizing, allowing you to select the exact amount of memory separate from the exact count of vCPUs, so your application perfectly fits on the infrastructure.

(photo by Guillaume Bolduc)
In other words, ACI allows us to create ephemeral containers that get their job done, and then disappear. This sounds like something that we want, and can use for Visual Studio Team Services, specifically for building things - instead of running a full-blown VM, you can bootstrap a container, run a build inside it, and then destroy the container.
Now, VSTS already offers hosted build agents, but the number of those is limited by default2, and you have to pay a bit more to get additional instances. So instead of going to the Visual Studio Marketplace, I thought that I would instead build an infrastructure on top of three things:
- Azure Container Instances - provide the build containers that will be the acting build agents.
- Azure Functions - to perform timed scans when we need to create new containers, and when we need to destroy those.
- Visual Studio Team Services - to manage the builds.
The general workflow can be broken down like this:

We are going to go in-depth on each of these boxes below.
Setting up VSTS affordances #
VSTS is pretty much in the middle of it all here - it handles the build definitions for provisioning, it also handles the build definitions for the product itself, as well as connects directly to the Azure subscription that manages the containers.
We need to start by connecting your Azure account to the VSTS instance that you created. For that, make sure to navigate to the Services settings page and add a new service:
https://{instance}.visualstudio.com/{project}/_admin/_services
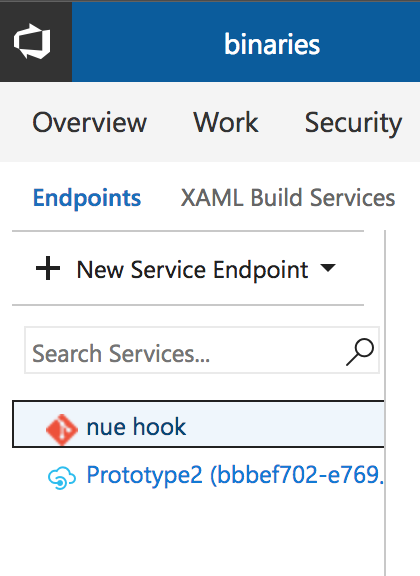
Now, you will also need to create a new agent pool, that we will use to group ACI builders. To do that, go to:
https://{instance}.visualstudio.com/_admin/_AgentPool
Create a new pool, and name it Azure Container Instances - that way, you will know for a fact that everything there will be a part of the ACI work that we are doing in this post.
Once done, we also need to set up and agent queue, and to do that, go to:
https://{instance}.visualstudio.com/{project}/_admin/_AgentQueue
Click on New Queue, and then Use an existing pool - make sure that you select the previously-created Azure Container Instances pool.
Great, you have now successfully set up the fundamentals. We can move on to setting up ACI.
Setting up Azure Container Instances #
Now that we have a final destination for all our build agents to be deployed to, we need to set up Azure Container Instances. The best way to do that is with the help of Azure CLI. Given that a lot of the work below is done within the console/terminal, make sure that you are at least familiar with the basic commands for your platform, as well as general shortcuts.
First things first, make sure to log in to your Azure subscription:
az login
Once you complete this relatively trivial step, we need to create an Azure Resource Group, that will house our cloud infrastructure:
az group create --name aci-builders --location westus
The name and location here can vary, depending on your needs, but make sure to remember or write these down, as you will need them down the line.
You will also need to create an Azure Container Registry:
az acr create --resource-group aci-builders --name aciregistry --sku Basic --admin-enabled true
The container registry is used to house your Docker images, and allows convenient deployment of those within your infrastructure with no extra hassle. It’s also a great way to store private images that you don’t want to publish in the Docker Hub (3).
Following the above, log in to the registry:
az acr login --name aciregistry
You are almost there! Let’s now push a docker image that we will be using for our purposes into the wild! For that, we will need a builder - an image capable of acting as a VSTS build agent. Luckily, the VSTS team already has such an image, available for free.
It’s worth mentioning that the image here is an Ubuntu container. Given my current needs, this should suffice. If you need to work with Windows containers, I recommend you start with the official documentation.

(photo by Abigail Lynn)
In order for us to be able to push images to the remote container registry, we need to know where that registry is located. There is a handy command for that:
az acr show --name aciregistry --query loginServer --output table
You should see a result similar to:
Result
----------------------
aciregistry.azurecr.io
This will be the address of the registry being used moving forward.
Let’s get the Docker image for the VSTS build agent locally first:
docker pull microsoft/vsts-agent
Next, let’s tag this image, to make it ready for deployment to our registry:
docker tag microsoft/vsts-agent aciregistry.azurecr.io/vsts-agent:v1
And finally, push the image into the registry:
docker push aciregistry.azurecr.io/vsts-agent:v1
Voila! Now you have an image ready for deployment inside the Azure Container Registry. One last step we need to do before we actually test the image - we need to get the necessary credentials to proceed. Let’s start with the password for the container registry:
az acr credential show --name acibuilders --query "passwords[0].value"
Record this password for future use. And let’s also get a personal access token for VSTS:
https://{instance}.visualstudio.com/_details/security/tokens
When you generate a token, specify the validity length that you are most comfortable with, but also make sure that you enable the following scopes:
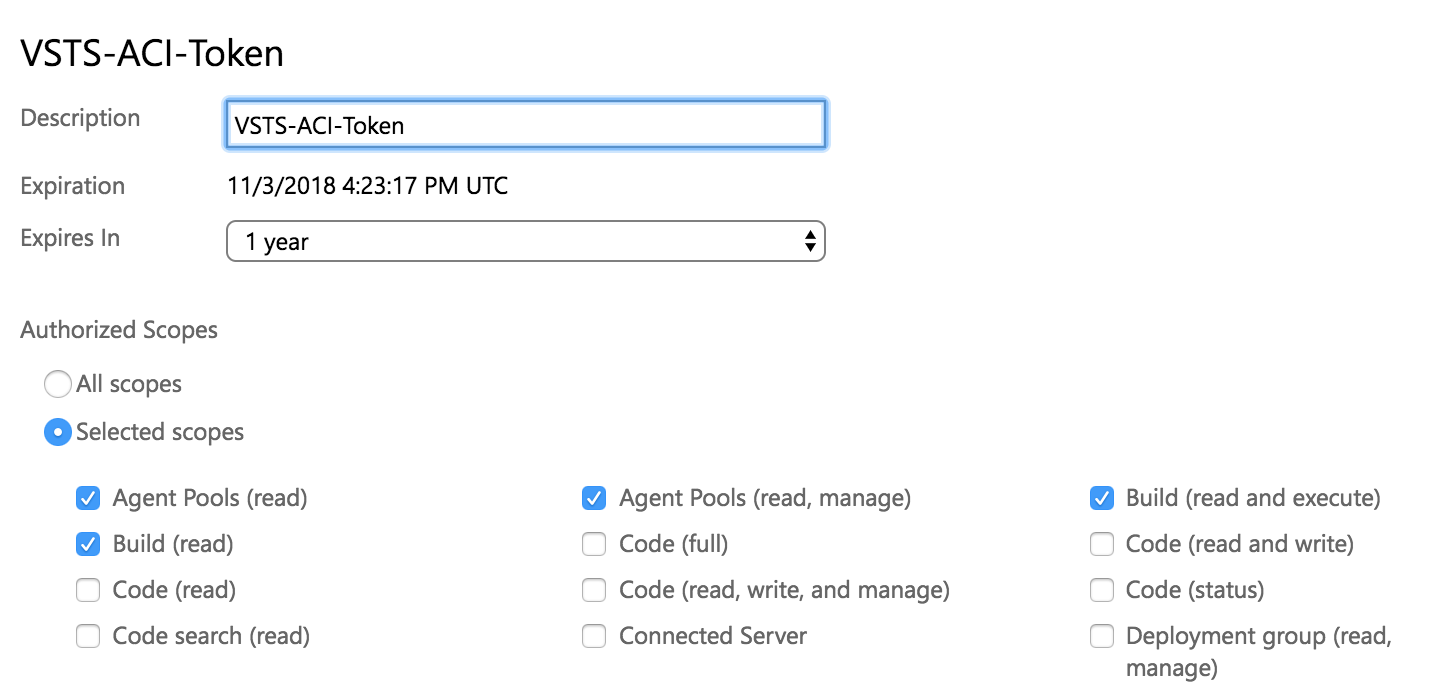
Now, let’s test this locally:
az container create \
    --name vsts-agent \
    --image aciregistry.azurecr.io/vsts-agent:v1 \
    --cpu 1 \
    --memory 1 \
    --registry-password {REGISTRY_PASSWORD_YOU_JUST_GOT} \
    --ip-address public \
    -g aci-builders \
    --environment-variables VSTS_ACCOUNT={VSTS_INSTANCE_YOU_HAVE} VSTS_TOKEN={VSTS_TOKEN_YOU_HAVE} VSTS_POOL="Azure Container Instances"
Worth noting that VSTS_ACCOUNT, VSTS_TOKEN and VSTS_POOL are environment variables passed into the container, and designed to bind it to the appropriate VSTS instance.
If the deployment goes well (and given all conditions were satisfied, it should), you should see a new container deployed in the Azure Portal:

And you should also see a build agent available in the VSTS agent pool, under Azure Container Instances
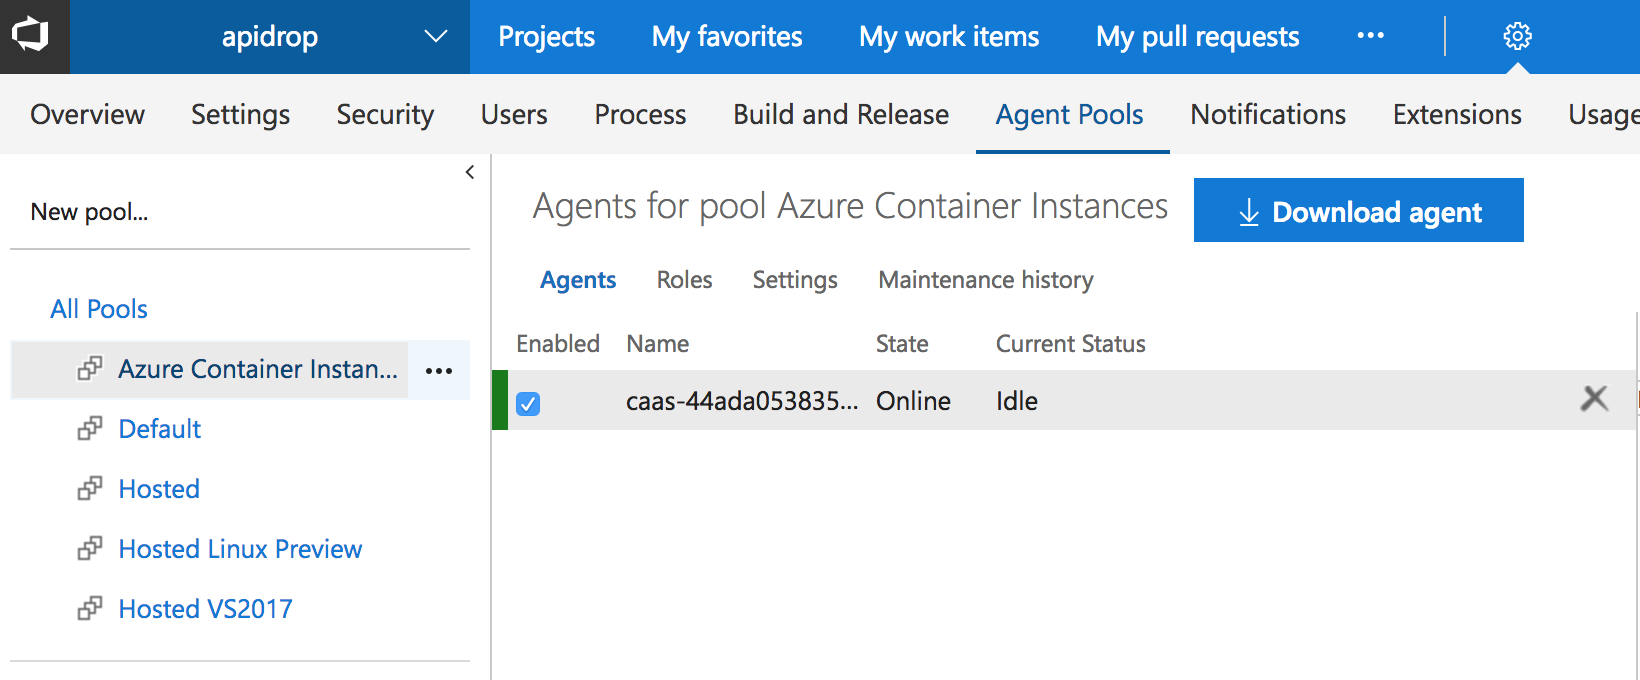
We’ve done the majority of the work! Now it’s time to automate the final couple of steps to tie everything together, and for that we’ll switch to Azure Functions and VSTS (again).
Setting up Azure Functions and VSTS Controller Build Definitions #
Let’s begin by once again going to VSTS, click on your project, and then Build & Release - we will need to create a new empty build definition. Inside that definition, you will need to add a build step - Azure CLI:
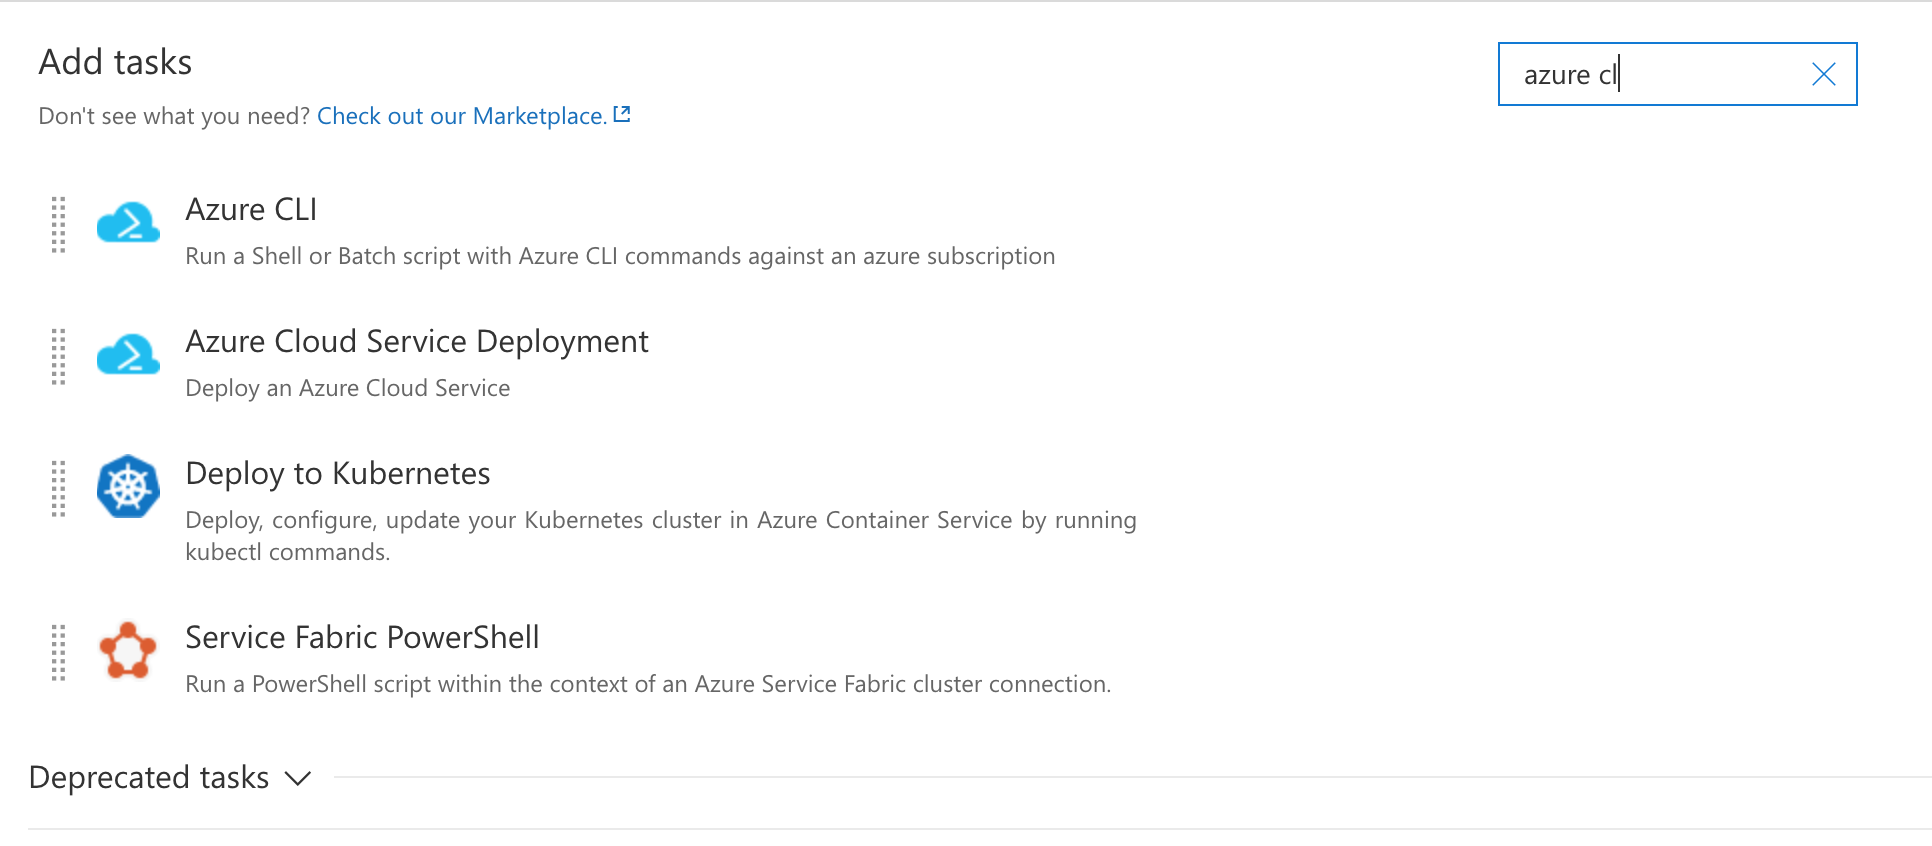
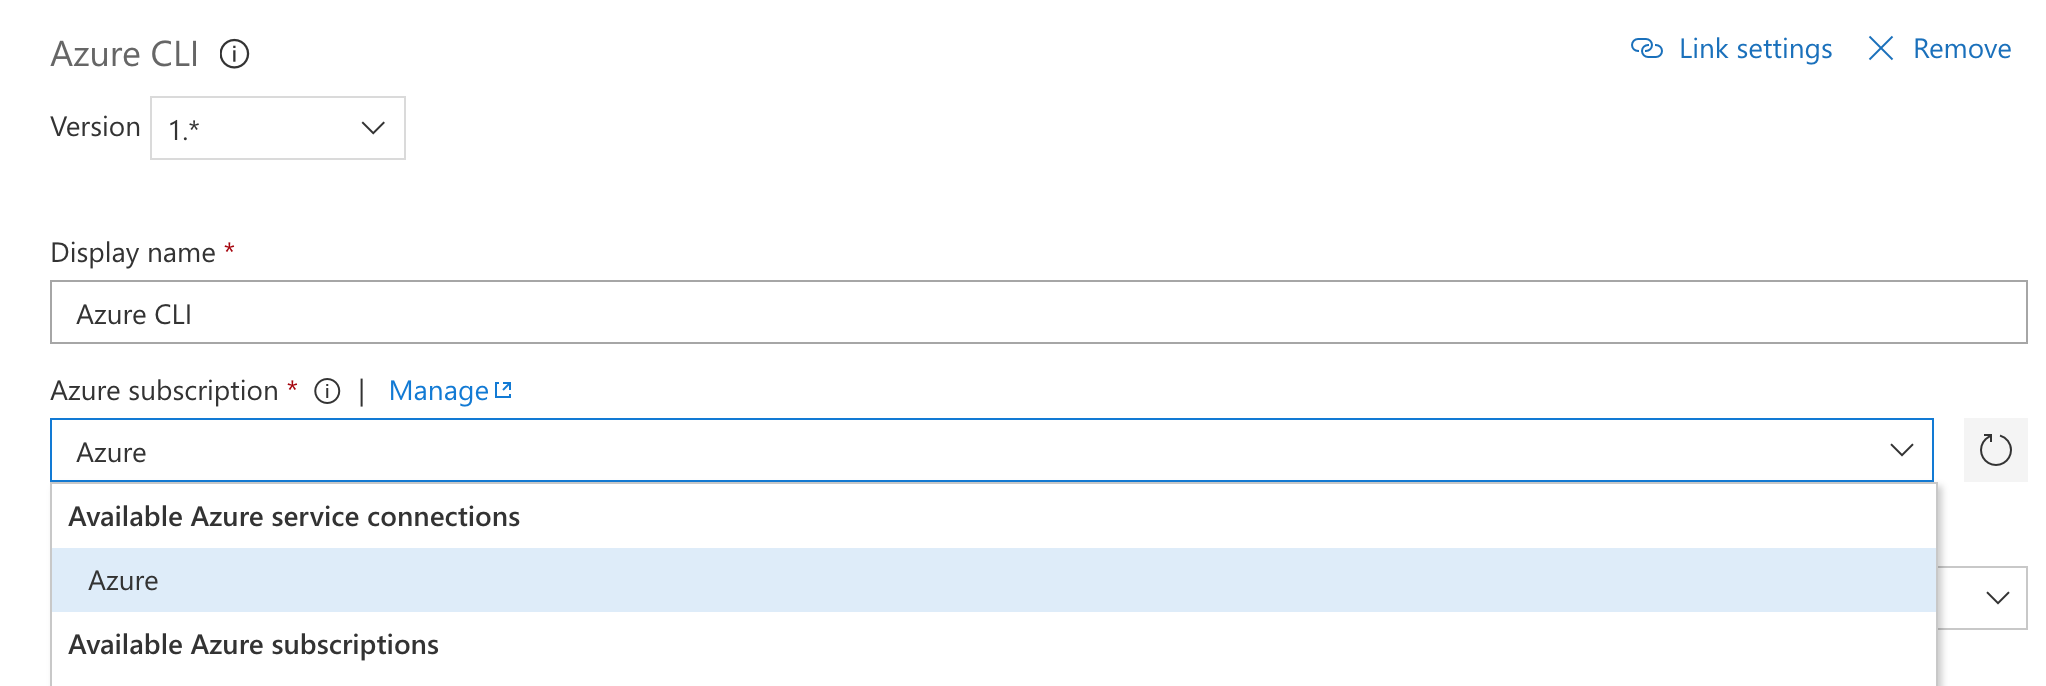
This will be the task that triggers the creation of new ACIs, so for that, we need to connect it to the Azure subscription (the same you added to Services at the beginning of this tutorial). Make sure you select it:
We now need to add an inline script, that will perform the same CLI calls for container creation that I outlined earlier, but in a loop (4):
for /l %%x in (1, 1, 5) do (
call az container create --name %%x --image %1 --cpu 1 --memory 1 --registry-password %2 --ip-address public -g %3 --environment-variables VSTS_ACCOUNT=%4 VSTS_TOKEN=%5 VSTS_POOL=%6
)
If you look at this snippet, you will probably realize that you are looking at Batch code - it’s definitely not the most readable or user-friendly, and you might be wondering why am I using Batch.
The reason is simple - to use the Azure CLI build task, we need to have the Azure CLI installed. The only hosted agent type that has the Azure CLI pre-installed is the VS2017-compatible builder, so it runs Windows. And the Azure CLI build task offers two flavors - Shell (Linux) and Batch (Windows) - given that we will be running the task on a Windows host, it makes sense to rely on Batch.
Now, we need to also add a number of arguments to pass to the build script (as you saw in the snippet, delineated by the % notation). To do that, use the Arguments field, and specify the following:
$(ContainerImage) $(RegistryPassword) $(ResourceGroup) $(VstsAccount) $(VstsToken) "$(VstsPool)"
Quick note - make sure to wrap the VstsPool variable in double quotes, given that the name of our agent pool has spaces in it.
Each and every one of these has been configured as a build variable within the same definition:
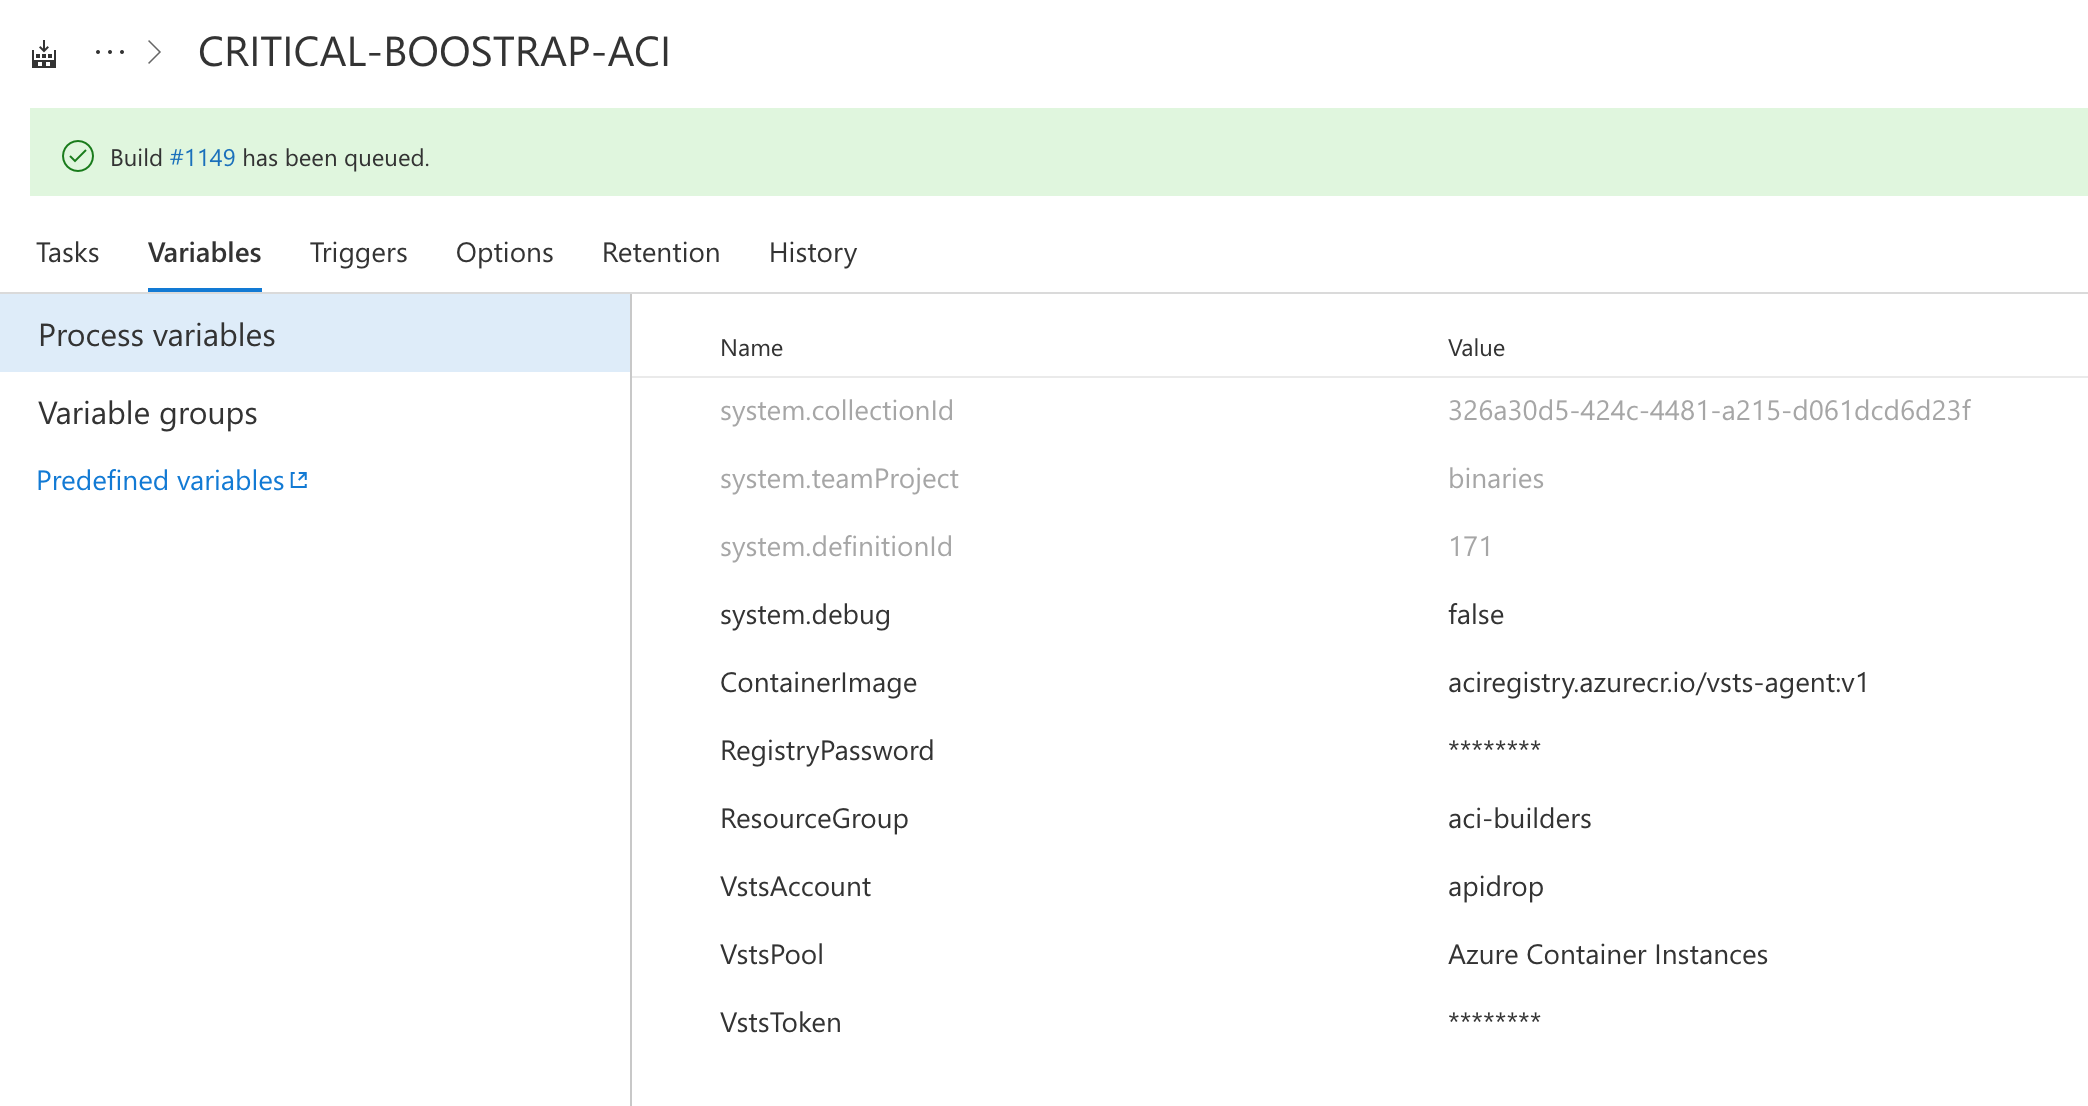
That way, you can both protect sensitive information, like keys and passwords, and also simplify definition maintenance. You can specify the same values in the build variables as you did in the CLI commands we used earlier.
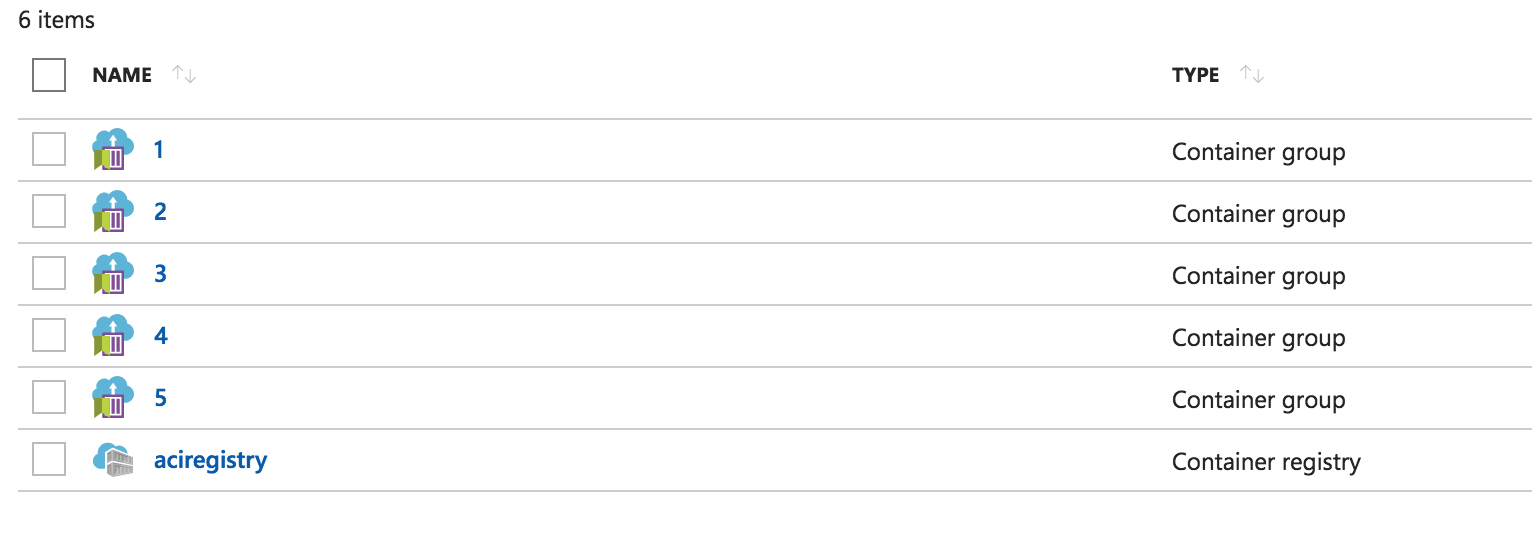
Now, queue the build definition and see that however many iterations of the loop you used (in the example above we had 5), we had that many container groups created:
This job will now work well when you need to quickly provision new container instances. But what about de-provisioning them?
For that, we will create a secondary job, similar to what we just had, with the same Azure CLI build step, but this time, with the following inline script:
for /f "delims=" %%i in ('call az resource list -g %1 --query "[].id" -o tsv --resource-type "Microsoft.ContainerInstance/containerGroups"') do (
call az resource delete --ids %%i
)
Where the argument passed as %1 is:
$(ResourceGroup)
Which is stored as a build variable and represents the name of the resource group where container instances are located.
What we are doing here is effectively cleaning up the entire resource group of everything that is of type Microsoft.ContainerInstance/containerGroups. Something worth calling out here is that the --ids parameter accepts a list of strings that are space-separated. If you omit -o tsv from the az resource list command, the command itself will error out. I’ve already opened an Azure CLI feature request for this.
Also, yes, I fully understand how horrible that snippet is, but that’s what we get for dealing with Batch, and it’s neither pretty, nor intuitive. C’est la vie.
Now, we have the build definitions in place for managing the general ACI workflow for builds. How do we trigger them from Azure Functions? Get some tea, and let’s get started.

(photo by Dai KE)
The goal of a function is to run more-or-less independently of the larger infrastructure, and performing almost surgical operations, where neccessary. You can read more about the benefits of serverless architecture in this article by Martin Fowler, however I will spare you the details in my blog post, assuming that you just want to know how to get things done.
In our case, a function will be running periodically and will check whether there are ACIs that need to be shut down, and if so, trigger the VSTS build definition that does just that.
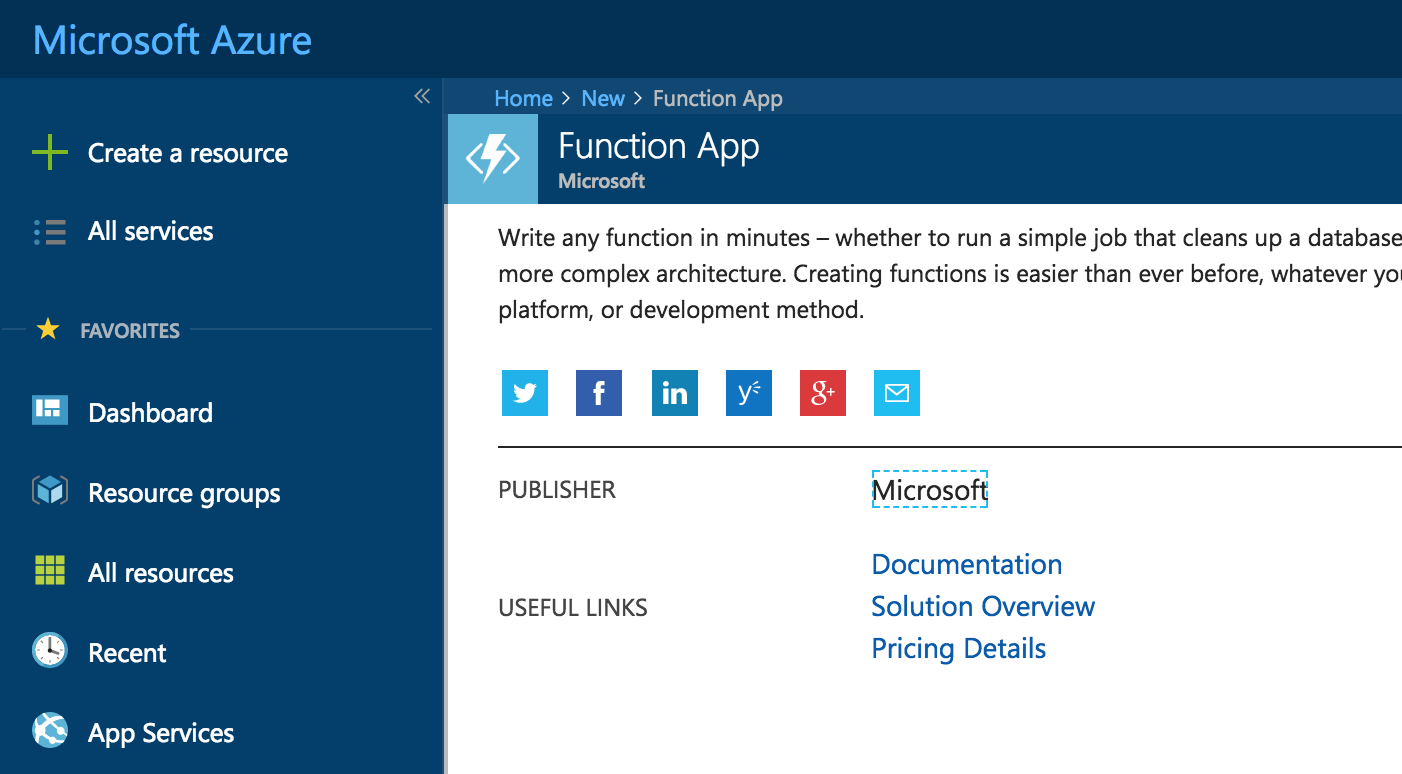
You can create a new Azure Functions app in the Azure Portal:
We need to create a timed function, running in C# - just use this as your CSX script reference:
#r "Newtonsoft.Json"
#r "System.Configuration"

using System.Net;
using System.Configuration;
using System.Net.Http.Headers;
using Newtonsoft.Json;
using System.Text;
using System;

public static void Run(TimerInfo myTimer, TraceWriter log) {
	using(var client = new HttpClient()) {
		string requestUrl = $ "https://apidrop.visualstudio.com/_apis/distributedtask/pools/6/agents";
		string token = Convert.ToBase64String(
		System.Text.ASCIIEncoding.ASCII.GetBytes(
		string.Format("{0}:{1}", "", "{YOUR_PERSONAL_ACCESS_TOKEN}")));

		HttpRequestMessage request = new HttpRequestMessage(HttpMethod.Get, requestUrl);
		request.Headers.Authorization = new AuthenticationHeaderValue("Basic", token);

		HttpResponseMessage response = client.SendAsync(request).Result;
		string responseString = response.Content.ReadAsStringAsync().Result;

		var agentContent = JsonConvert.DeserializeObject < AgentSet > (responseString);

		if (agentContent.Count == 0) {
			// There are no build agents in the ACI queue
			log.Info("There are no agents. No need to do anything.");
		} else {
			bool buildsAreHappening = false;

			foreach(var agent in agentContent.Value) {
				requestUrl = $ "https://apidrop.visualstudio.com/_apis/distributedtask/pools/6/jobrequests?agentId={agent.id}&completedRequestCount=25";

				request = new HttpRequestMessage(HttpMethod.Get, requestUrl);
				request.Headers.Authorization = new AuthenticationHeaderValue("Basic", token);

				response = client.SendAsync(request).Result;
				responseString = response.Content.ReadAsStringAsync().Result;

				var agentJobsContent = JsonConvert.DeserializeObject < BuildJobsSet > (responseString);

				if ((from c in agentJobsContent.Value where string.IsNullOrWhiteSpace(c.result) select c).Count() > 0) {
					// There is a number of non-empty jobs, so we still need containers.
					buildsAreHappening = true;
					break;
				}

				log.Info(agent.name);
			}

			if (!buildsAreHappening) {
				Console.WriteLine("Need to destroy all containers.");
				// Destroy container instances.
				requestUrl = $ "https://apidrop.visualstudio.com/DefaultCollection/binaries/_apis/build/builds?api-version=2.0";

				request = new HttpRequestMessage(HttpMethod.Post, requestUrl);

				client.DefaultRequestHeaders.Accept.Add(new MediaTypeWithQualityHeaderValue("application/json"));
				client.DefaultRequestHeaders.Authorization = new AuthenticationHeaderValue("Basic", token);

				string buildJson = @"{
                    ""definition "": {
                        ""id "": 172
                    },
                    ""queue "": {
                        ""id "": 10
                    }
                }";

				var content = new StringContent(buildJson, Encoding.UTF8, "application/json");

				var result = client.PostAsync(requestUrl, content).Result;
				log.Info(result.Content.ReadAsStringAsync().Result);
			}
		}
	}
}
Worth noting that here you will also be using your personal access token from VSTS that gives you access to everything that’s happening in the build. We are using basic authentication with it, and passing that to the HttpClient instance that performs all the necessary requests.
There are a couple of model classes that I have not included in the snippet above, in the interest of brevity, but you can easily build them out yourself by pasting the response JSON in Visual Studio through Edit>Paste Special.
Make sure to also configure your function to run at intervals that are convenient for you:

In this case, running every 5 minutes might be a bit excessive, but in an environment with lots of builds, that ensures that your ACIs are not idling for no reason.
When the function runs, it will check whether there are any outstanding builds against the Azure Container Instances queue, and if there are - it will leave everything as is. If there are no builds, likely we don’t need the containers at this time, so it will just trigger the build job that removes the containers with the help of Azure CLI.
Conclusion #
There are many items in this tutorial that are generally introduced as a proof-of-concept - in a production environment, you’d want more configuration settings instead of hard-coded values, and potentially a more robust build manager than another CI job kicking off CLI commands. With that in mind, this shows you just how easy it is to integrate ACI, VSTS and Azure Functions for your build needs.
-
When signing up for an Azure account, you will need to have a valid credit card. ↩︎
-
You can have one hosted agent per configuration - Linux, Hosted Windows and Hosted Windows with Visual Studio 2017. ↩︎
-
There is absolutely nothing wrong about hosting your images in Docker Hub, if you want to - just make sure to adjust some of the steps of the tutorial accordingly. ↩︎
-
The reason a loop is used here is because we want to have multiple instances ready at any given time. You don’t have to do this if you need just one, so feel free to just remove the for wrapper from the code snippet to create one instance. ↩︎