DIY Docs In The Cloud
Table of Contents
TL;DR: Watch this video for a tutorial if you don’t want to read the whole post:
Yet another one of those times where people kept asking about something on Twitter, and I thought that it would be easier to write a blog post explaining the inner workings of things instead of responding in 280 characters. This time, this relates to “How can I build my own little docs.microsoft.com”, so let’s tackle the problem head-on.

I’ll start off by saying that with this blog post, you won’t have the true docs.microsoft.com experience - there are a lot of moving pieces behind the scenes (CDA, build infrastructure, etc.) that is designed to scale. What I am describing today is merely an introductory course on “Here is how you can build your own documentation site in the cloud”, and if you plan to host docs for millions of developers worldwide, you might want to invest in additional tools and services.
Getting the Infrastructure Plan #
To get started, let’s define the components that we will use:
- GitHub. That’s where we will host the content we want to be published to the cloud. Nobody stops you from using any other source code hosting provider, of course - at the end of the day, it’s just a bucket for your Markdown (or other format) content.
- VSTS. We want to make sure that the publishing process is more or less automatic.
- Azure Storage. That’s where the published content will be stored. And with recently-announced static site hosting being available, this really is the way to go.
In addition to above, we will be using macOS as our base, so get ready to dive into the world of bash.
Bootstrapping a Content Repository #
The role of the content repository will be two-fold:
- Host the baseline human-editable content that needs to be built. This is done with the help of Markdown files simply sitting in a structured manner (read: in folders).
- Host the build configuration, that is - the
docfx.jsonfile that carries all the necessary information.
You can use my test repository for inspiration - there are two folders in it, representing the content (docs) and build scripts (scripts). The docs folder is structured in a way that encompassess both cotnent and configuration:
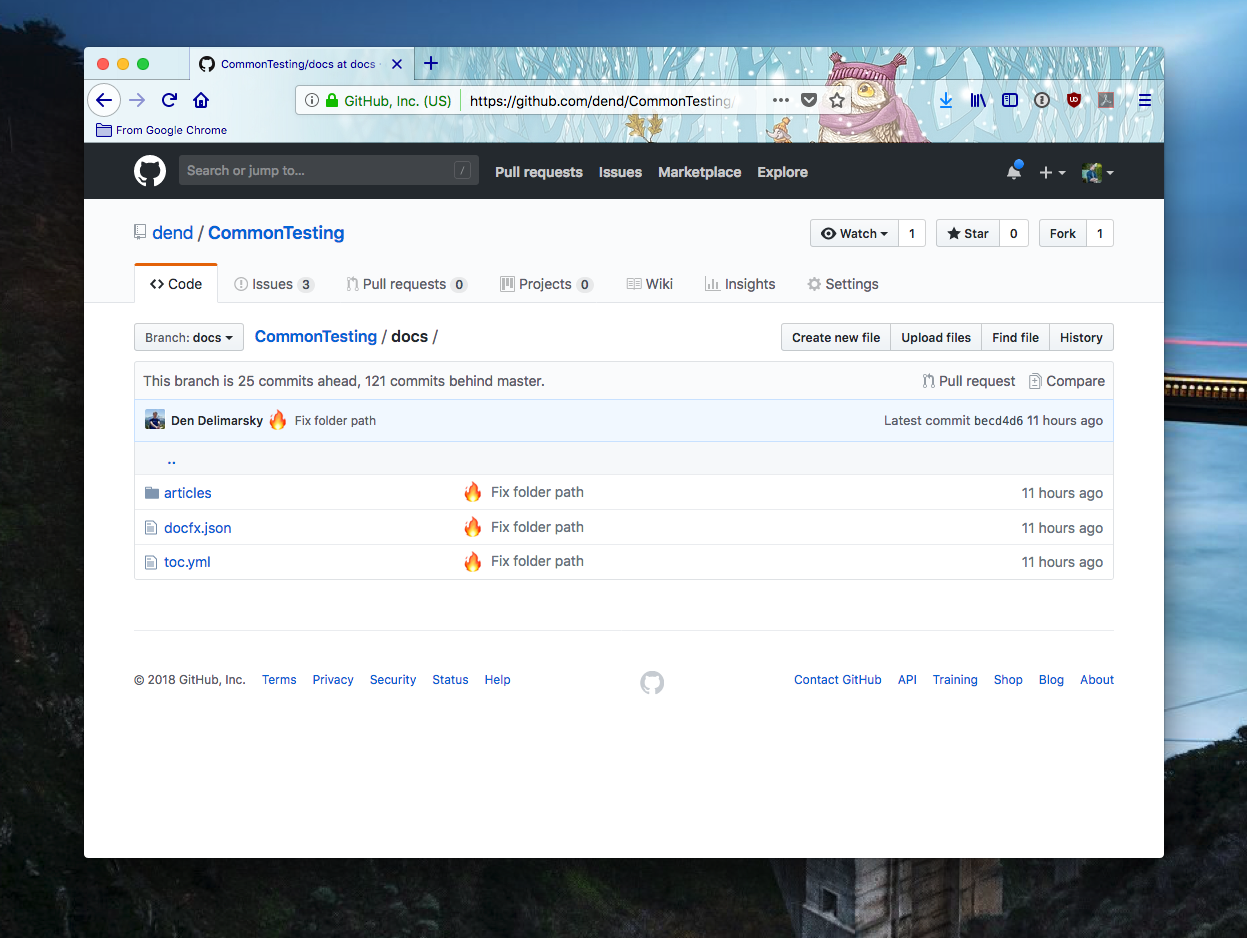
There really is not much science to it - you can structure the folders in a way that is convenient to you, and place Markdown files there. The docfx.json file contains the very basic build configuration that defines where things are coming from and where those go:
{
  "build": {
    "content": [
      {
        "files": [
          "articles/**.md",
          "articles/**/toc.yml",
          "toc.yml",
          "*.md"
        ]
      }
    ],
    "resource": [
      {
        "files": [
          "images/**"
        ]
      }
    ],
    "dest": "_site",
    "globalMetadataFiles": [],
    "fileMetadataFiles": [],
    "template": [
      "default"
    ],
    "postProcessors": [],
    "markdownEngineName": "markdig",
    "noLangKeyword": false,
    "keepFileLink": false,
    "cleanupCacheHistory": false,
    "disableGitFeatures": false
  }
}
For the most part, and at this time, you can ignore the metadata values - you need to declare the right folder informaiton in the content node - this determines where the build process scans for content to publish, and the resource node - the build will determine what types of resources are being pulled from what folders (e.g. images).
If you look at the image above, you will also notice that I have a toc.yml file. In DocFX, content is usually part of a table of contents (TOC), and the toc.yml file is a definition of just that:
- name: Index
  href: index.md
  items:
    - name: Article
      href: articles/index.md
Very simple - just one article in this test repo, with an index page in the root. The index page in the root will become the index.html for the site.
We’re all set with the content, so now let’s jump over to the build configuration.
Making Builds Happen #
Before content can be published, DocFX needs to build it - translate the hand-written (or auto-generated) content into HTML pages. To do that, we can run DocFX locally, but that obviously won’t scale - you don’t want to clone your content repo, generate the pages, and then copy them somewhere else. You want automation - we all want automation for everything! So how about we build the content in the cloud, with the help of Visual Studio Team Services (disclaimer: you can use any other CI tool with enough time too).
For the purposes of this blog post, I am just going to assume that you already created a free account there (if not - sign up). Log in to your project, click on Build and Release in the navigation bar, and create a new build (click the + New button). Again, making a lot of assumptions here, but you should select GitHub as the source location - if you used another source provider, you can select that as well; the beauty of VSTS is that it is source location-agnostic.
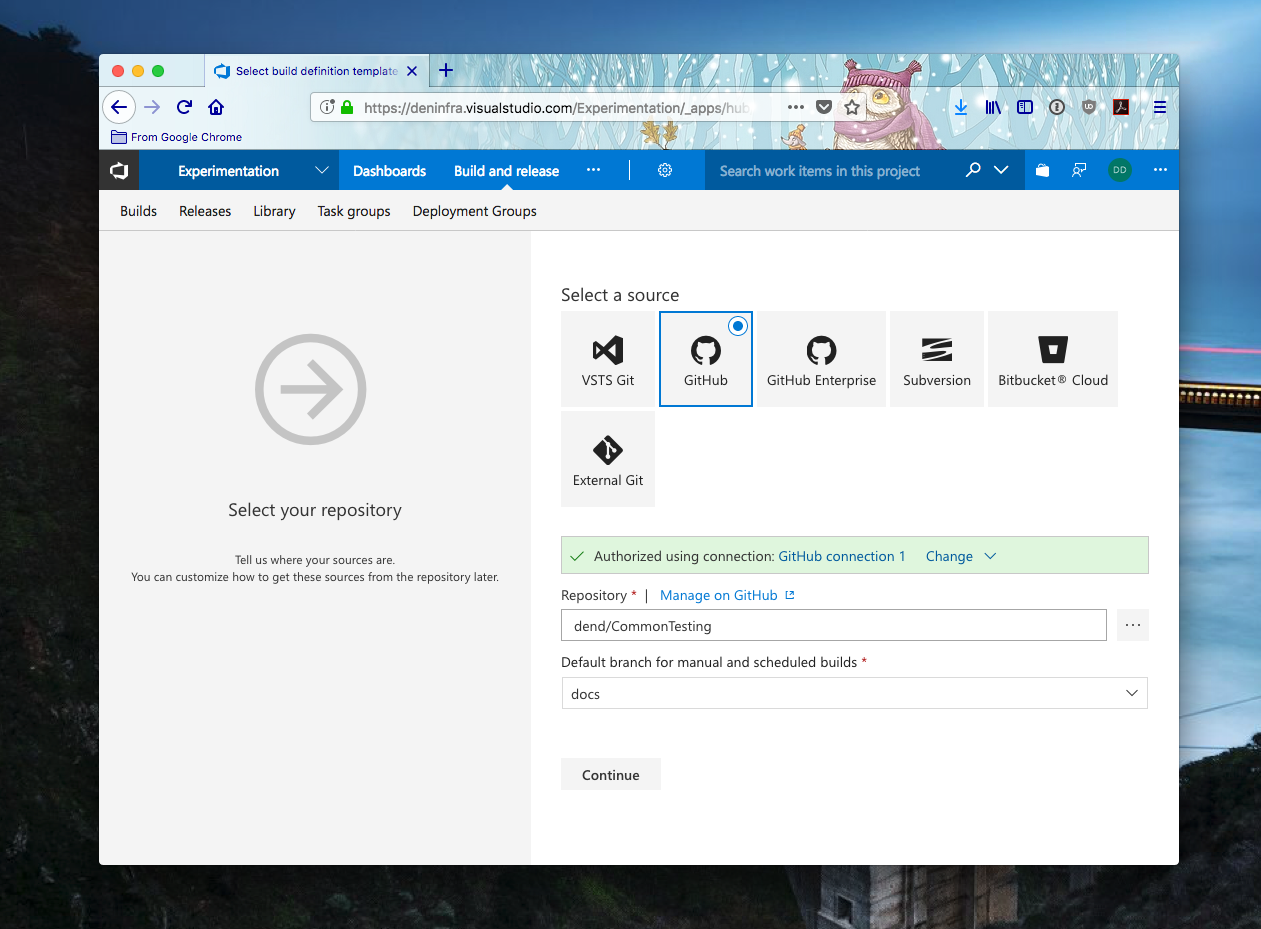
We are configuring the job for the content repo, so the GitHub repository you will specify here is the one where you host all your content you want published.
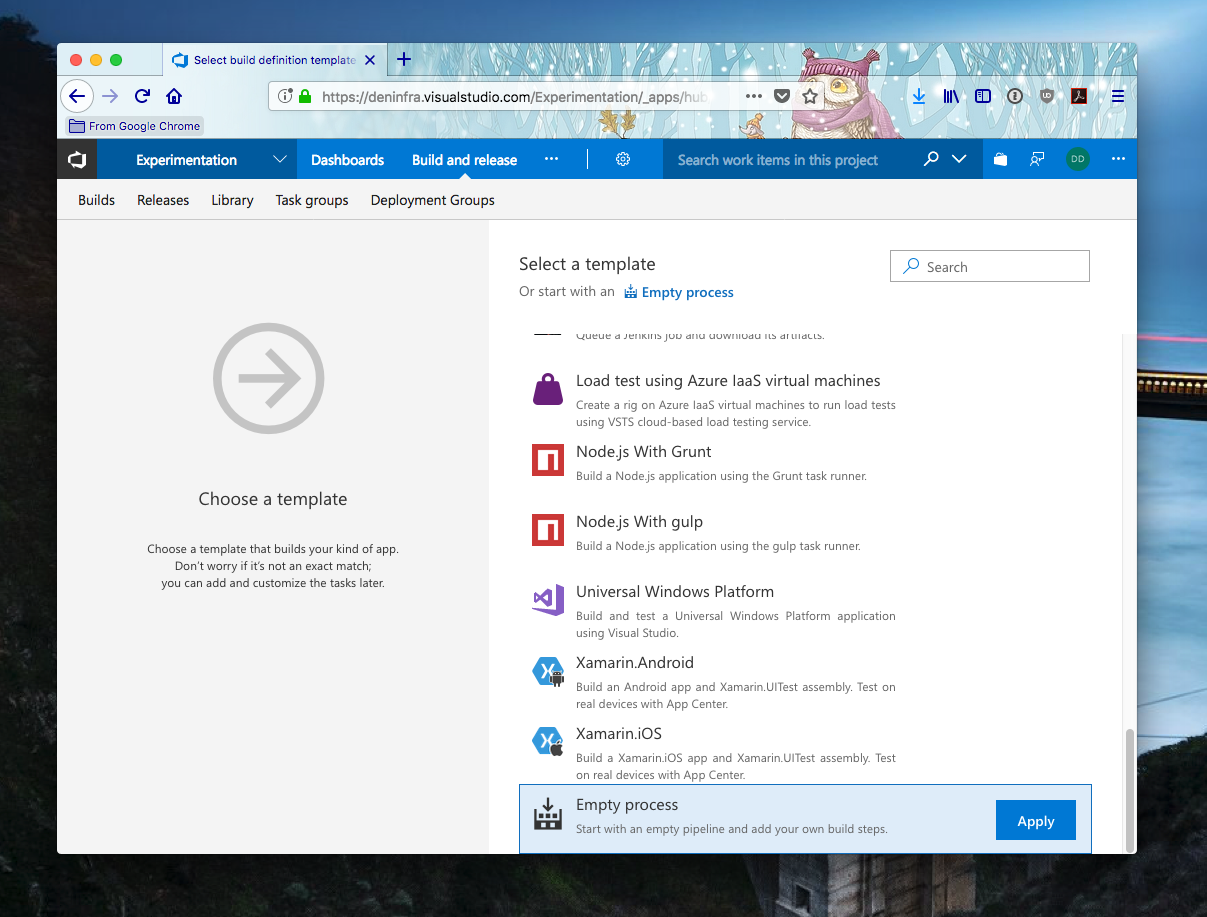
Now you can click Continue and select Empty Process, as we don’t need any pre-configured steps yet:
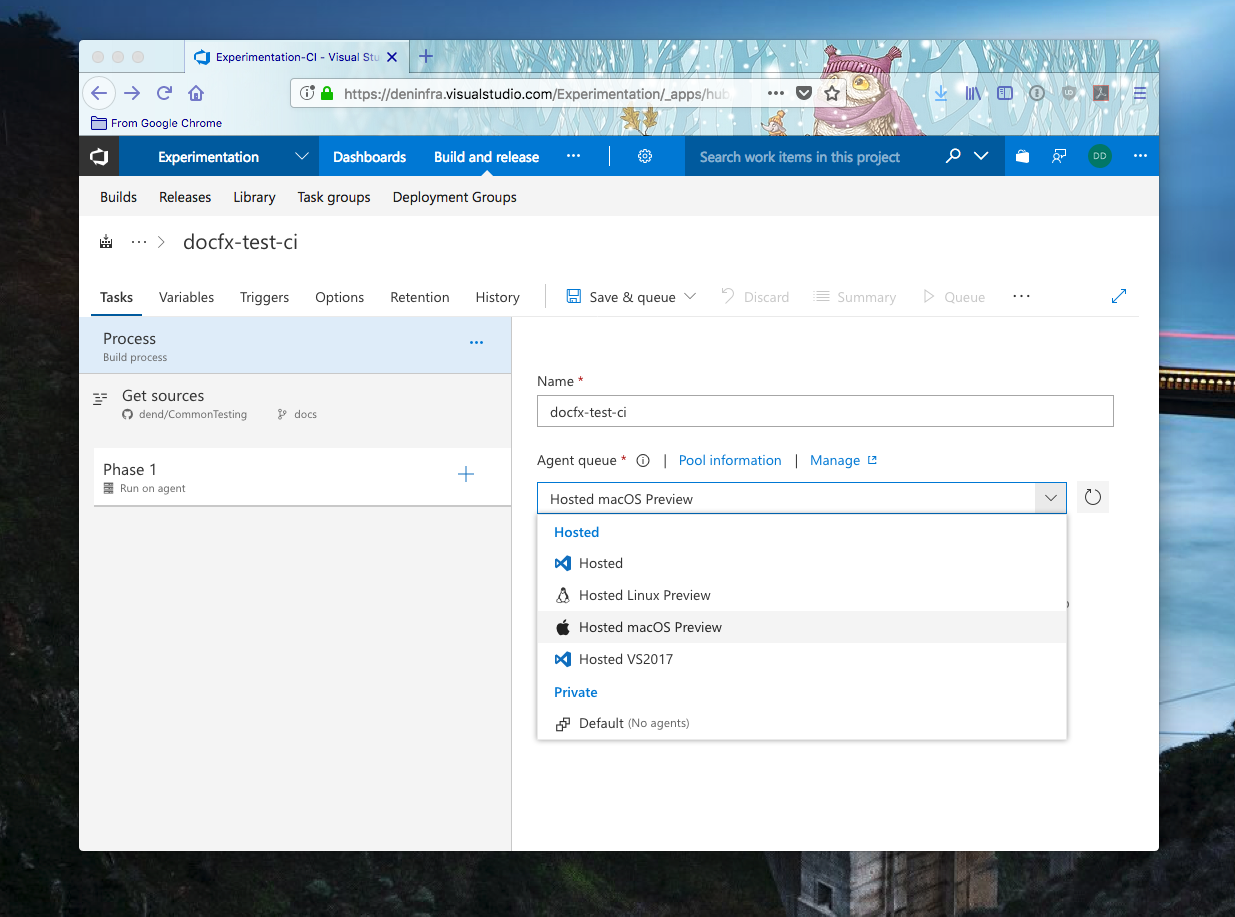
Next, we will need to configure the build job agent - this is the type of machine where builds will happen. People will say that there are no shortcuts on the road to success, but we’re going to massively disappoint those people by stating that, in fact, there are some you can apply at least in this process. One of those shortcuts is using the macOS Hosted Agent for your build.
Here is why - your first hunch would be to probably use Windows or Linux agents, which is fine. However, the macOS Hosted Agent comes with mono pre-installed. If you’ve seen my Intro to DocFX video, you’ve likely learned that you can run DocFX with mono on macOS - you can do the same on Linux, but that means you have to install the framework on the agent yourself. And we want to get up and running quickly, so we’re going to skip the installation steps and rely on what’s already on the agent (yay for instant gratification).
Once the agent is specified, we need to add a new step to the build process, that will execute a bash script from within the repo. Recall that back at the beginning of this post, where we talked about content repo organization, I mentioned that there is a scripts folder - that folder contains a file I created called build.sh. The contents of that file are shown below:
mkdir $BUILD_SOURCESDIRECTORY/_dl
mkdir $BUILD_SOURCESDIRECTORY/_bin
mkdir $BUILD_SOURCESDIRECTORY/_publish

wget -O $BUILD_SOURCESDIRECTORY/_dl/docfx.zip "https://github.com/dotnet/docfx/releases/download/v2.37/docfx.zip"
unzip $BUILD_SOURCESDIRECTORY/_dl/docfx.zip -d $BUILD_SOURCESDIRECTORY/_bin/docfx

cd $BUILD_SOURCESDIRECTORY/$DOCSFOLDER
mono $BUILD_SOURCESDIRECTORY/_bin/docfx/docfx.exe
cp -R $BUILD_SOURCESDIRECTORY/$DOCSFOLDER/_site/. $BUILD_SOURCESDIRECTORY/_publish/
It does five things:
- Create the necessary build folders.
- Downloads a DocFX release from GitHub.
- Extracts the release locally.
- Builds the content we cloned from the build repository.
- Copy files from a processing folder to a publishing folder (technically optional).
Because this is just an experimental project, I am not doing much validation - the temporary processing folders that you see being created above are being provisioned within the same folder with the rest of the source code that was cloned from the content GitHub repo, so there might be naming clashes if your repo already has folders named _dl, _bin or _publish.
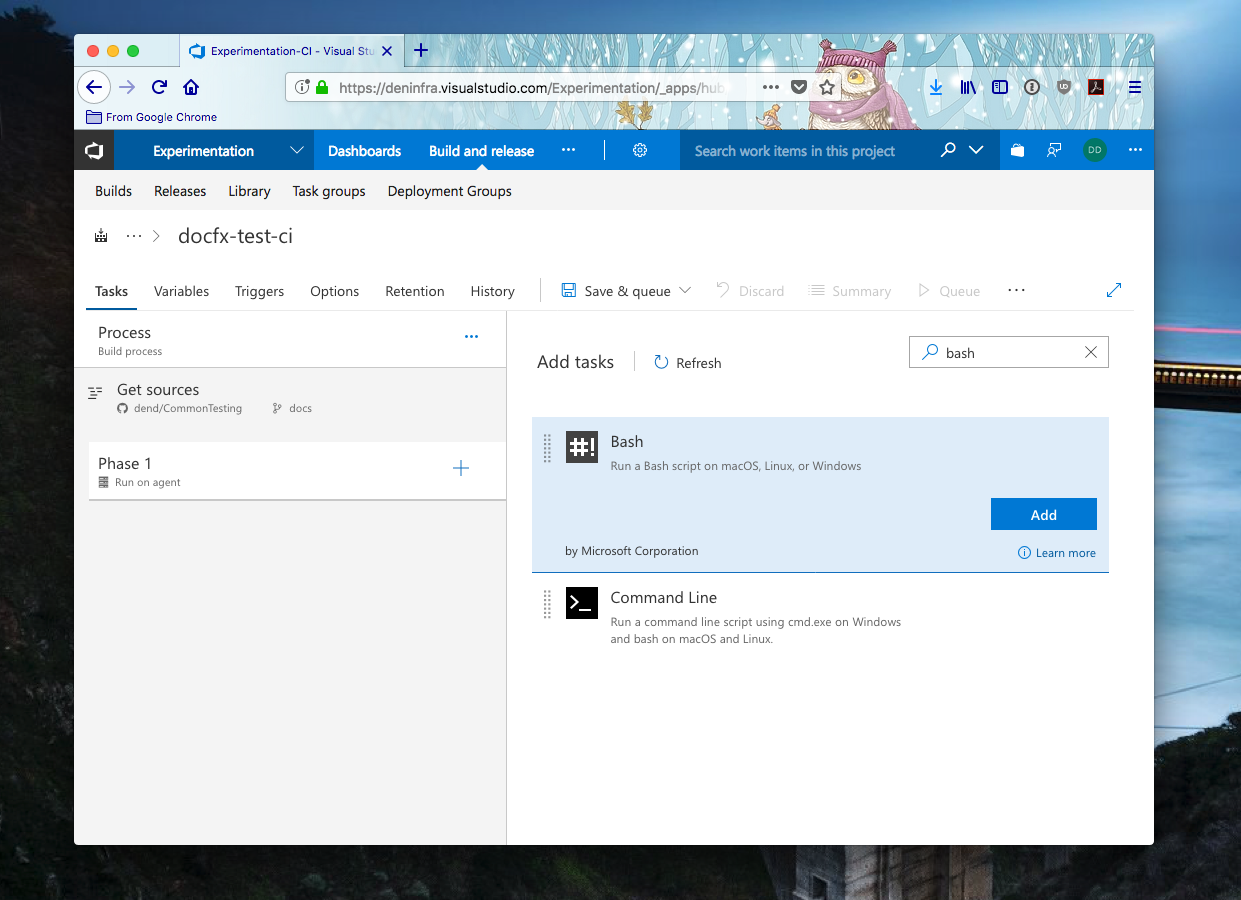
In our build definition, click on the plus sign, and search for bash:
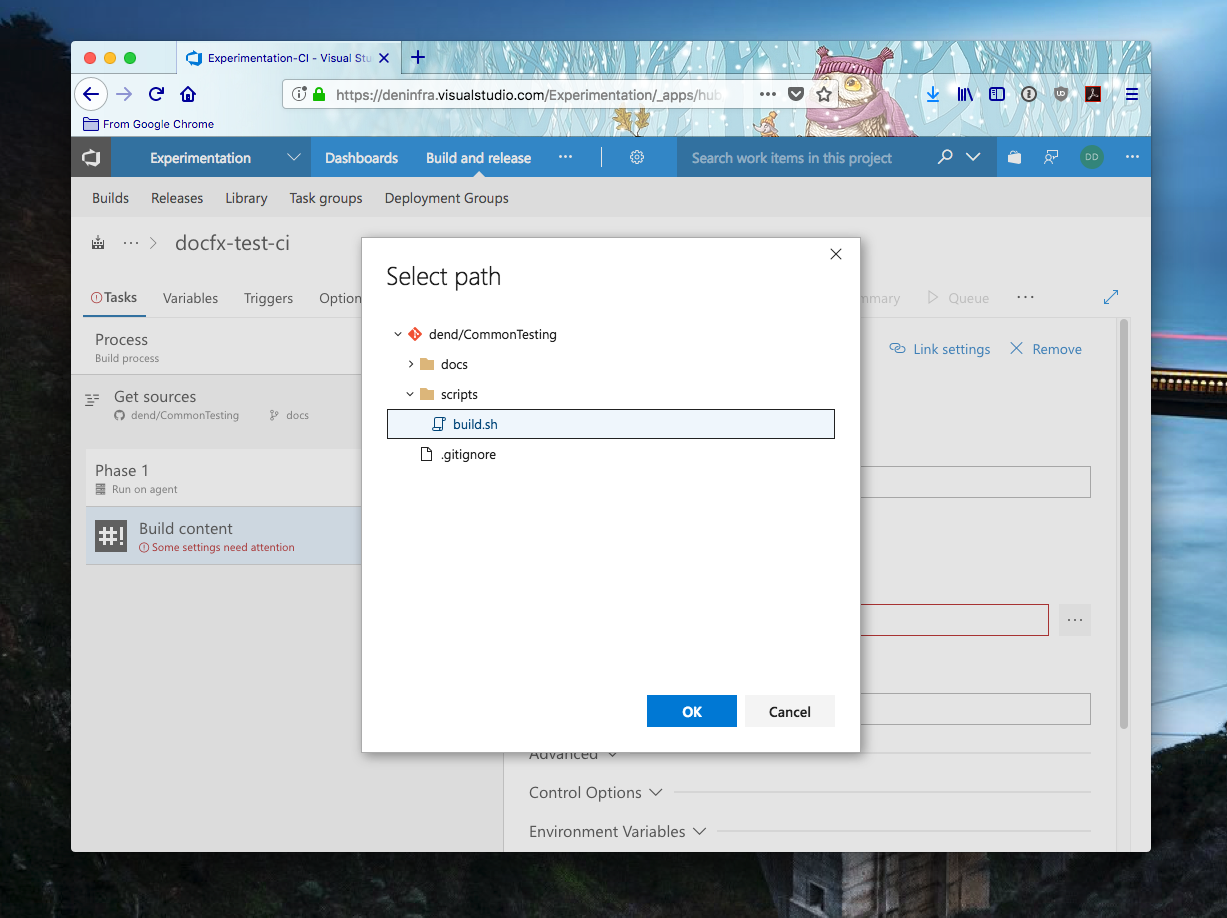
Add that step to the process, and specify the path to the bash script you will be executing:
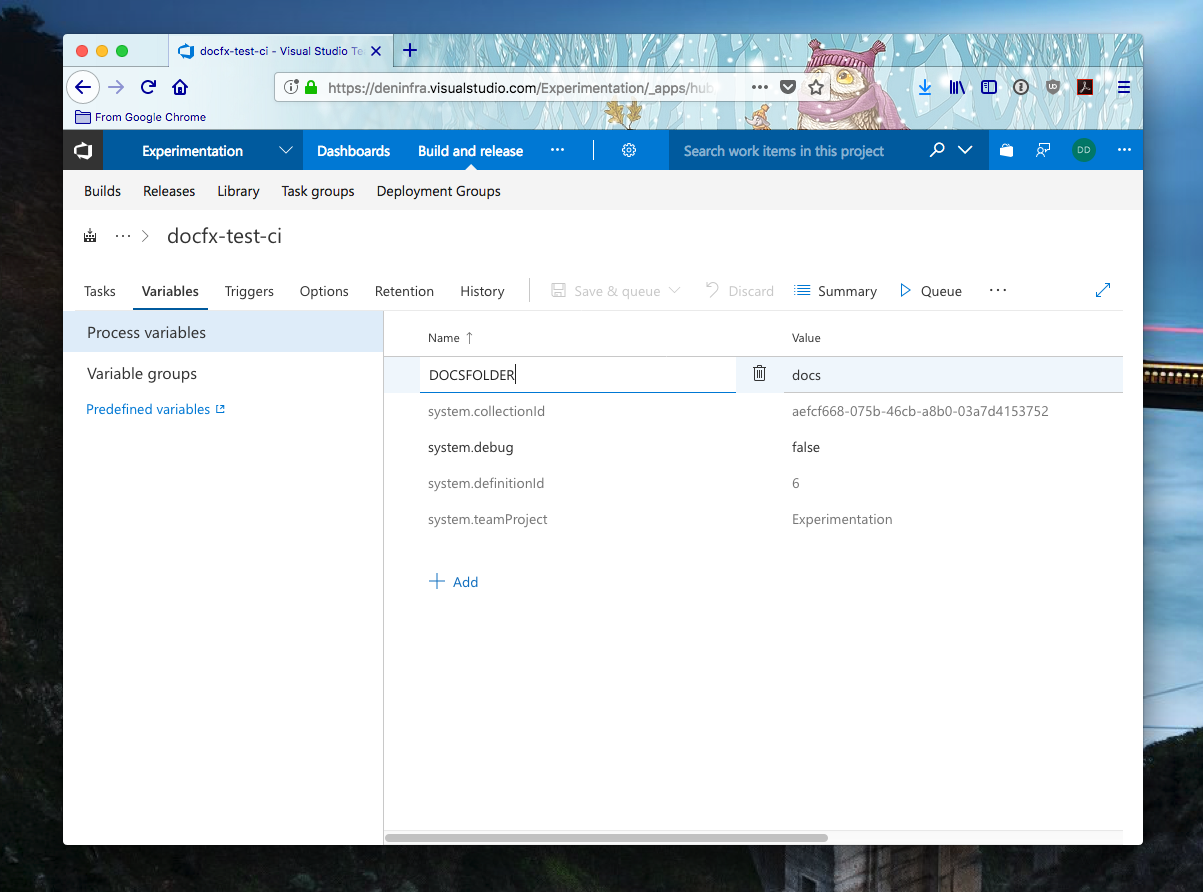
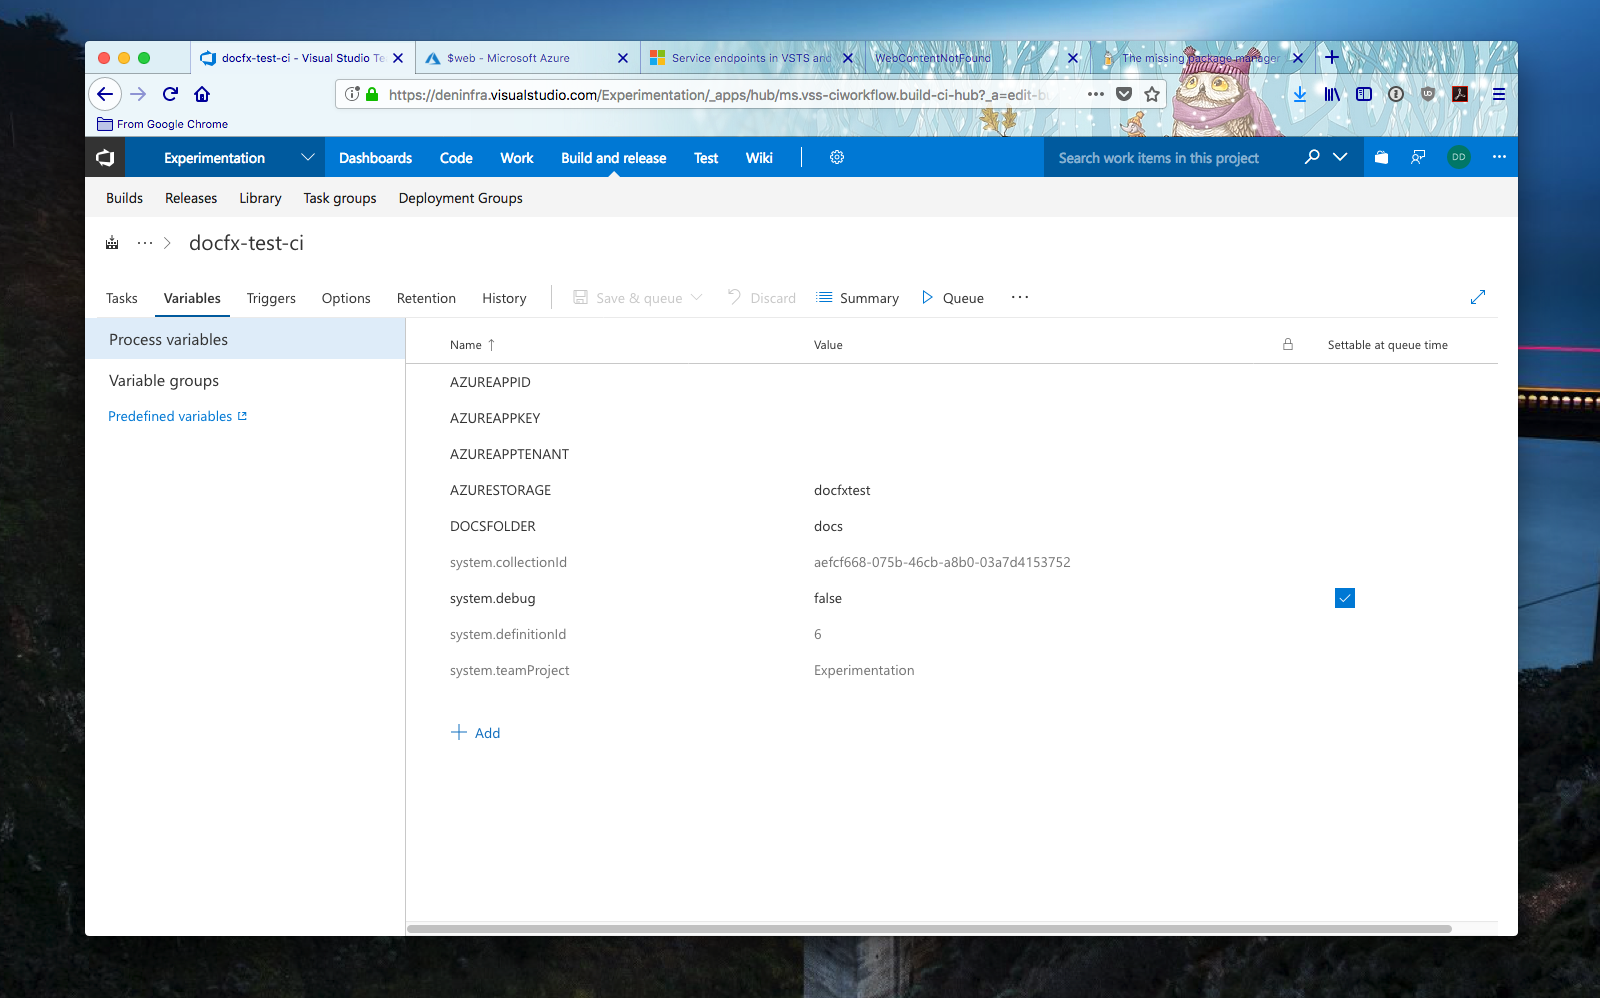
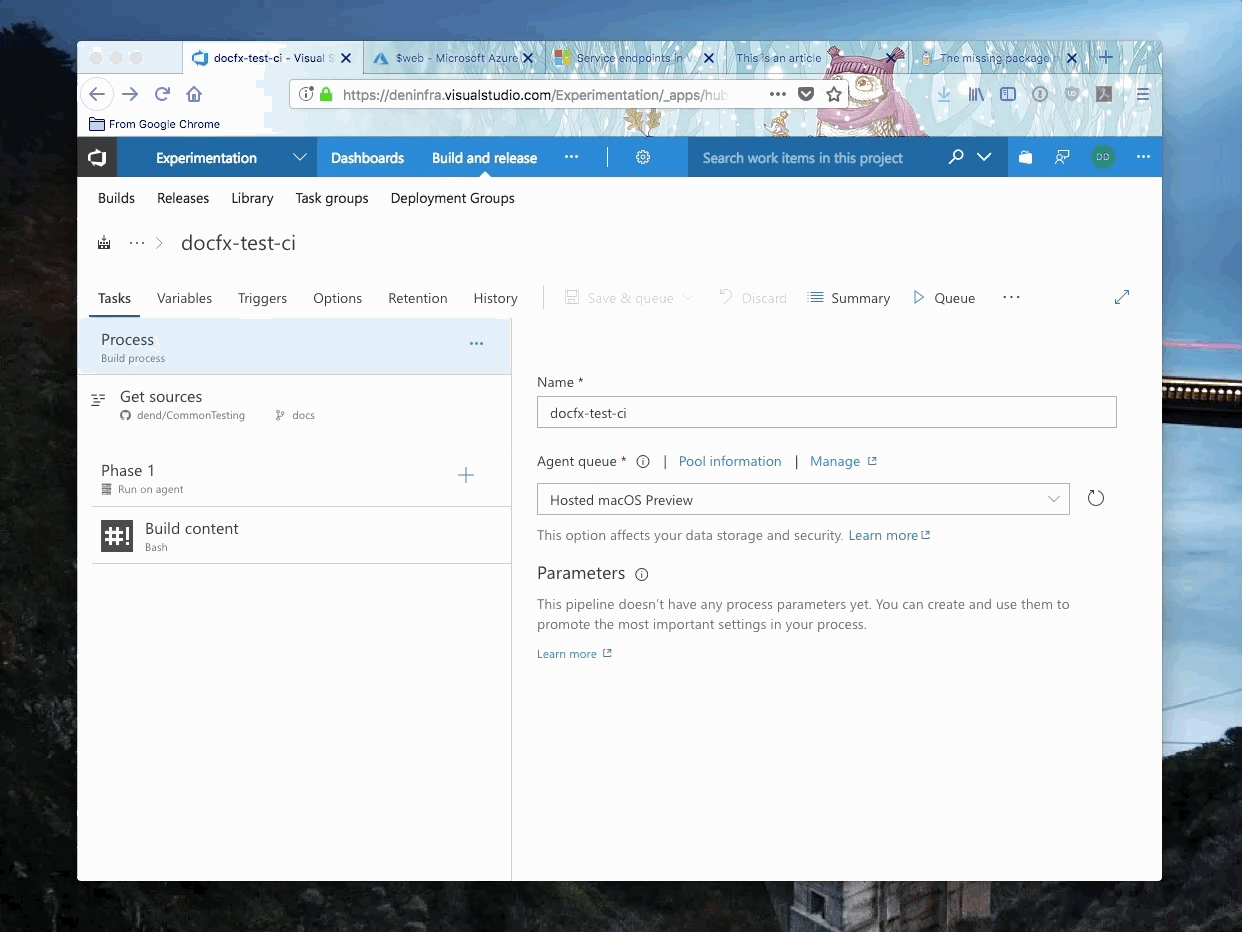
Take a look at the script above, and notice that we are using some build variables - $BUILD_SOURCESDIRECTORY and $DOCSFOLDER. The former is just a standard VSTS variable that gives us the path to where the source is located (you can read more about it here). The latter, on the other hand, is a variable we create to tell the process where the docfx.json file is located. In your build definition, go to the Variables tab and create a new variable called DOCSFOLDER, with the value set to the relative path to the folder where you host the docfx.json file in your repository:
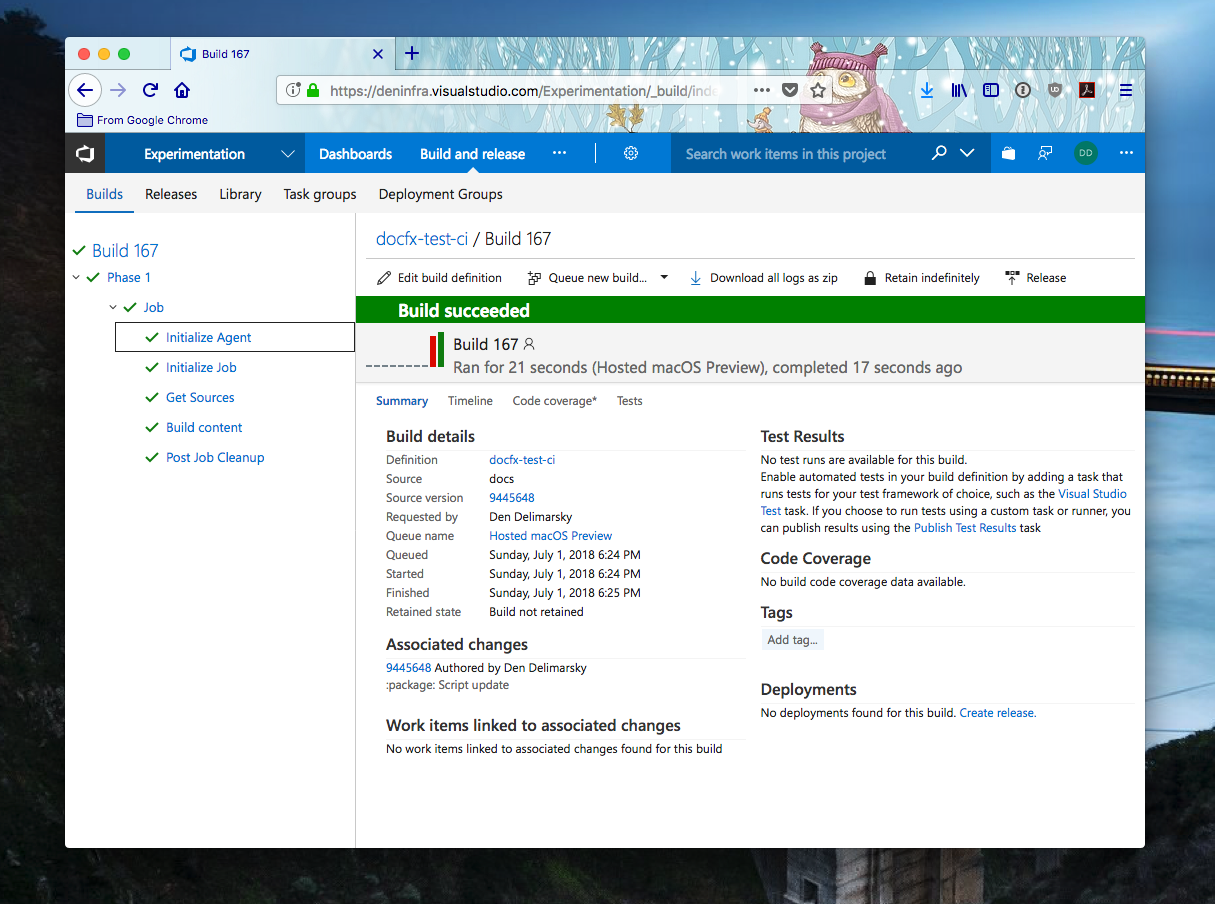
Save the job, and queue it! If all was configured correctly, you should be blessed with the green build status:
But wait, there is more! Now that the build is succeeding, it all goes into the void once the build completes. We need to actually push the content into the cloud.
Publishing to The Cloud #
If you already have an Azure subscription (if you don’t - sign up), open up the Azure Portal and create a new Storage Account.
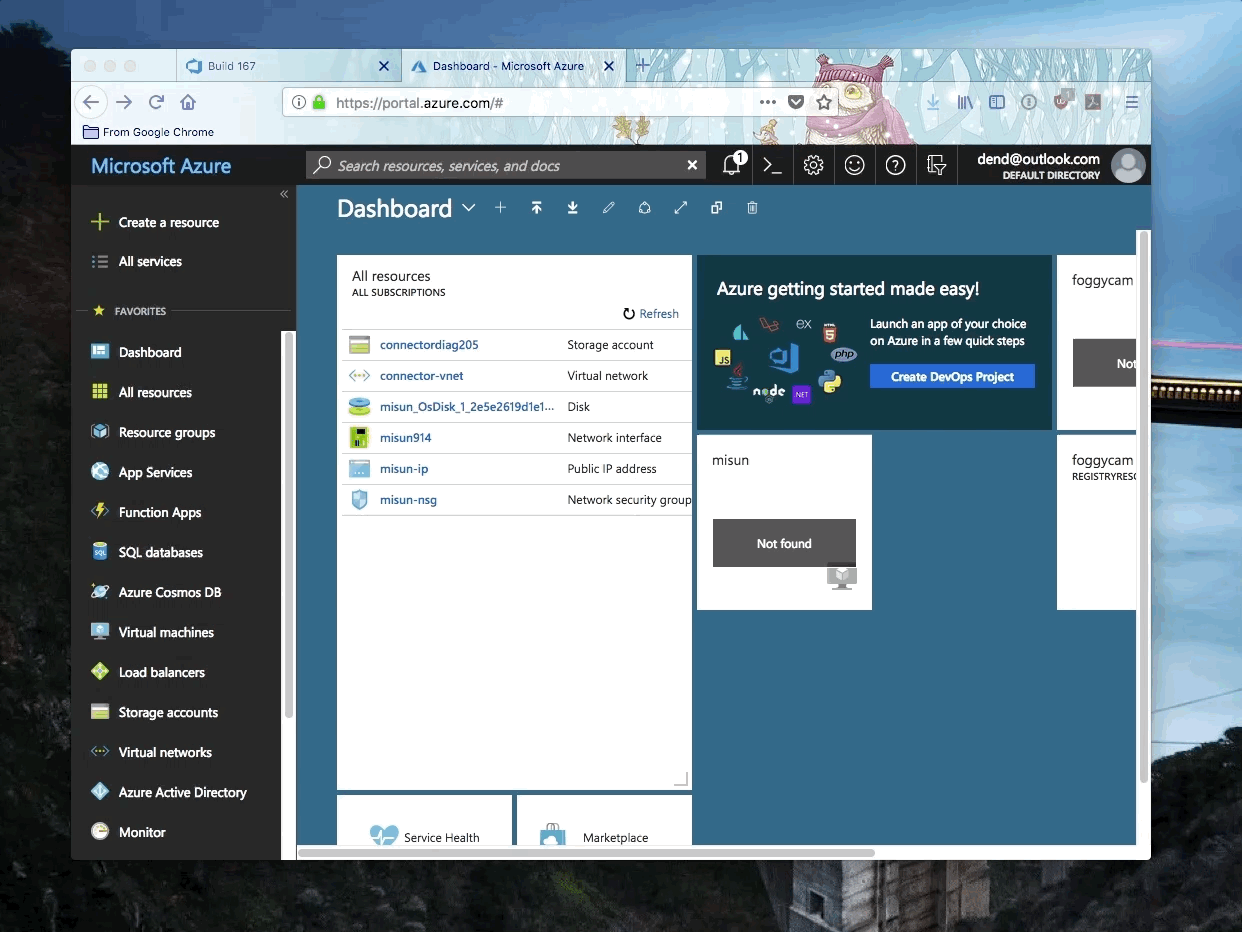
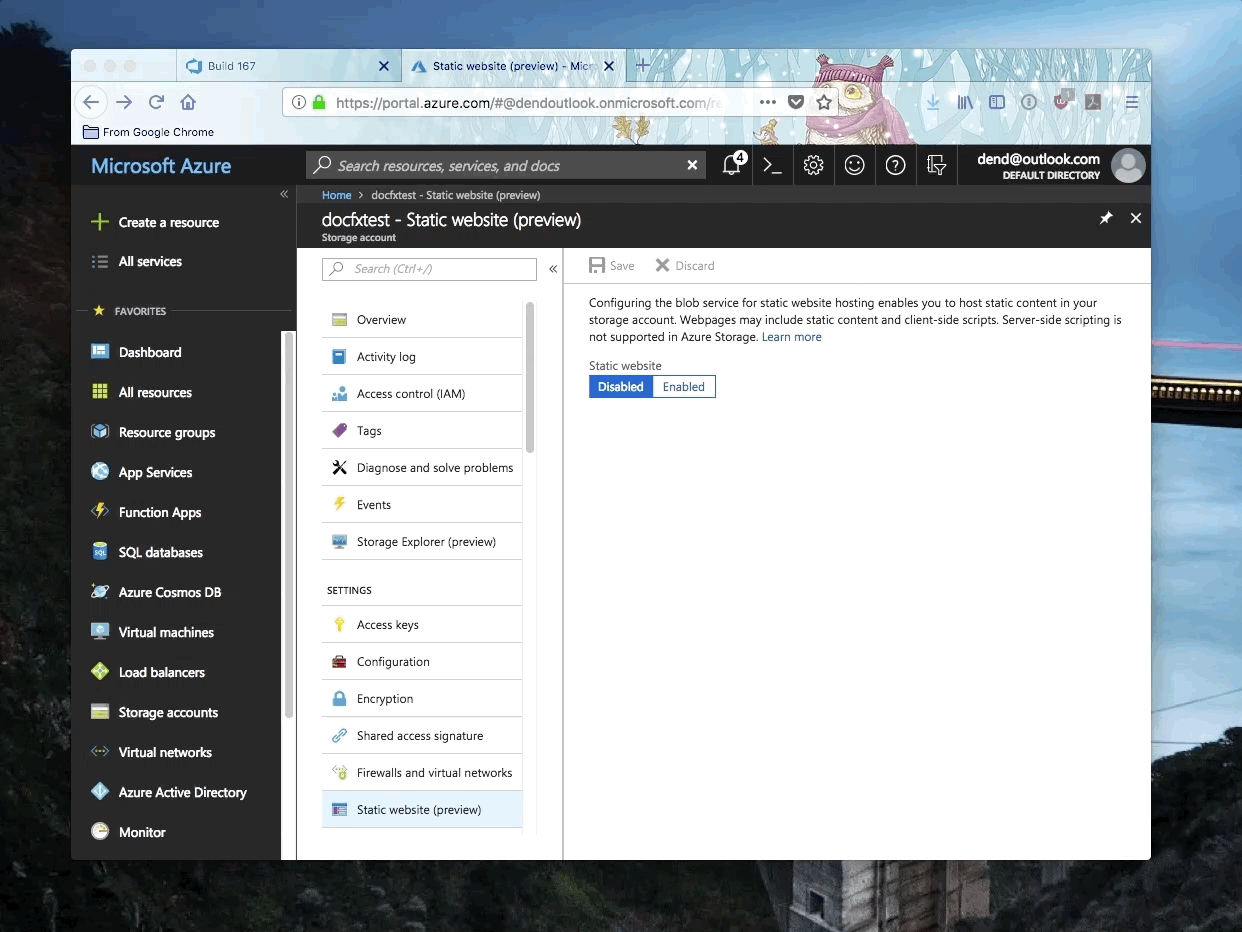
For most options in that panel, you can leave at their default values. Just make sure to specify a unique name for the account and you select StorageV2 as the type of the account (that’s the only one for which static site hosting is enabled). If the configuration was successful, you will be able to open the storage account and see the Static website (preview) as an option in the Settings segment. Navigate there and enable the feature with default options configured.
Now you’re finally ready to push the documentation content to the site! To do that, let’s get back to the build definition that we have in VSTS. We will need to make adjustments to the original build script - it didn’t account for Azure uploads. One drawback of using the macOS Hosted Agent is that it doesn’t, in fact, have an Azure CLI installation available, which makes any attempt to use pre-built steps (e.g. Azure File Copy) moot. So instead, we will log in and upload content through the shell script.
Before we start with the tweaks, make sure to create a new service principal. There is a good article that explains how to do that. You can also do that through the Azure Portal - all it takes is to just create a new app registration in Azure Active Directory, assign the app with proper Contributor permissions in the subscription IAM and copy the key and app ID information.
Looking back at the script, we will make it look like so:
brew update && brew install azure-cli

echo "Logging in to Azure..."
az login --service-principal -u $AZUREAPPID -p $AZUREAPPKEY --tenant $AZUREAPPTENANT

mkdir $BUILD_SOURCESDIRECTORY/_dl
mkdir $BUILD_SOURCESDIRECTORY/_bin
mkdir $BUILD_SOURCESDIRECTORY/_publish

wget -O $BUILD_SOURCESDIRECTORY/_dl/docfx.zip "https://github.com/dotnet/docfx/releases/download/v2.37/docfx.zip"
unzip $BUILD_SOURCESDIRECTORY/_dl/docfx.zip -d $BUILD_SOURCESDIRECTORY/_bin/docfx

cd $BUILD_SOURCESDIRECTORY/$DOCSFOLDER
mono $BUILD_SOURCESDIRECTORY/_bin/docfx/docfx.exe
cp -R $BUILD_SOURCESDIRECTORY/$DOCSFOLDER/_site/. $BUILD_SOURCESDIRECTORY/_publish/

az storage blob upload-batch -s $BUILD_SOURCESDIRECTORY/_publish/ -d \$web --account-name $AZURESTORAGE
It grew a bit - we are now using Homebrew to install the Azure CLI, logging it to Azure via the service principal created above, and at the end - uploading a bunch of files to the $web container. We’ve also added three more build variables - $AZUREAPPID, $AZUREAPPKEY, $AZUREAPPTENANT and $AZURESTORAGE:
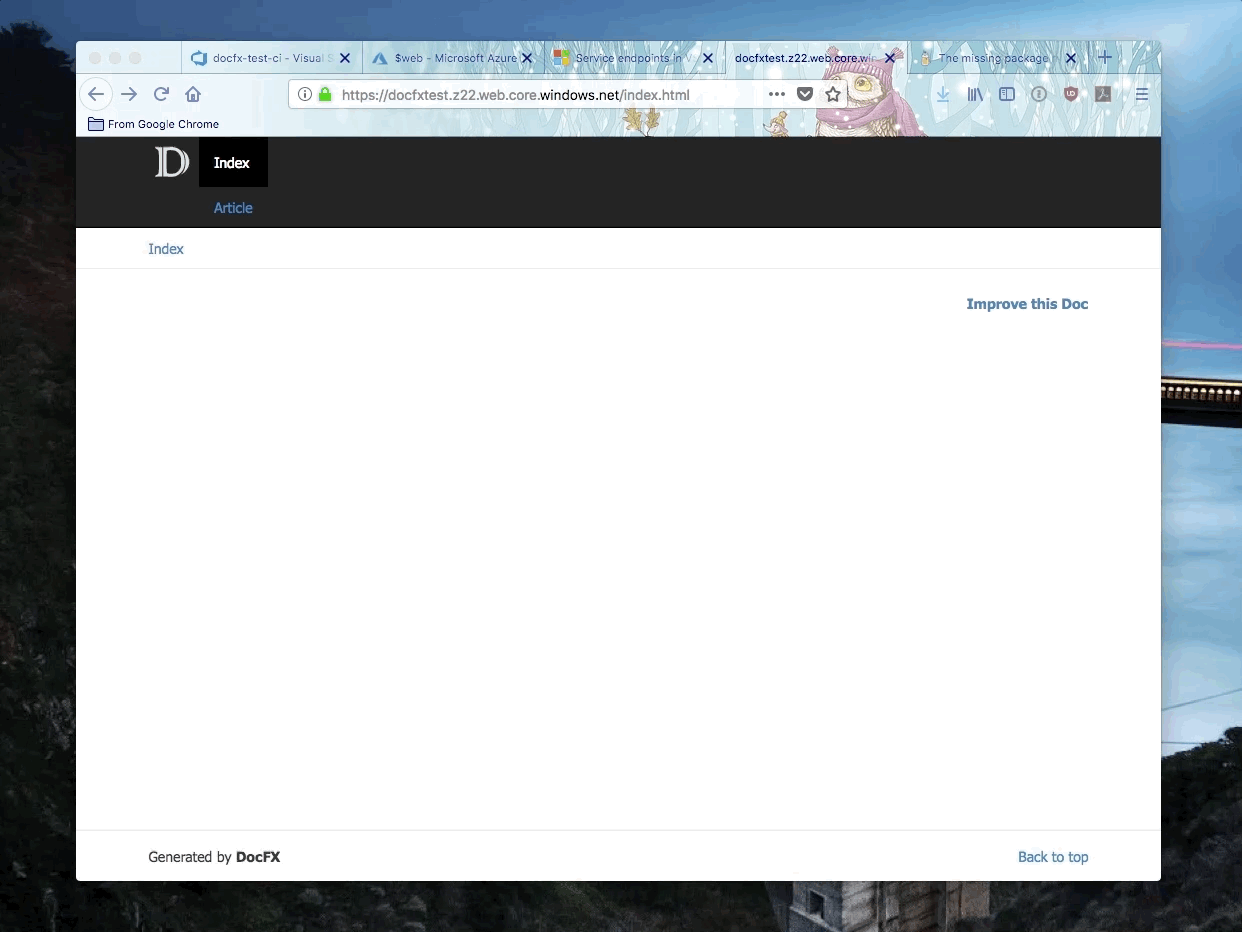
Under all normal (production) circumstances, you should either use secure variables or Azure KeyVault to make sure that those are hidden from logs, so me using them in plain-text is a really bad idea if this wouldn’t be for a blog post. Make sure you are careful with where creds go. Once the script runs, and the content is generated, you will see that the site can now render properly!
Now, let’s make sure that the site is updated automatically every time the content updates. For that to happen, in VSTS we can just set up a custom trigger in the Triggers view:
Now you have docs in the cloud, based on the same system that powers docs.microsoft.com!
Conclusion #
As it turns out, there are no shortcuts to success after all - we win some (pre-installed mono) and we lose some (no pre-installed Azure CLI). That said, the overall process from start to finish is relatively painless - setting up DocFX in the cloud is a matter of having the right CI configuration and an endpoint where you can place the generated HTML. In some of the next installments, I will go over hosting API documentation within the same Azure Storage instance, based on DocFX, since Markdown usually does not scale well if you need to cover thousands of APIs. Happy documenting (and Happy Canada Day! 🍁)