Restricting Your Azure App Service Site To Specific Microsoft Accounts
Not too long ago I decided to host a static site on Azure App Service (it’s a bit too big for Azure Static Web Apps) and while at it, I also decided that it would be nice if I could restrict who could access the site.
Azure App Service has a pretty powerful option to enable out-of-the-box authentication in literally a few clicks. A developer can use a variety of available identity providers, but I decided to stick with Azure Active Directory (AAD) since all my infrastructure is in Azure anyway and it would be that much easier to customize and maintain it.
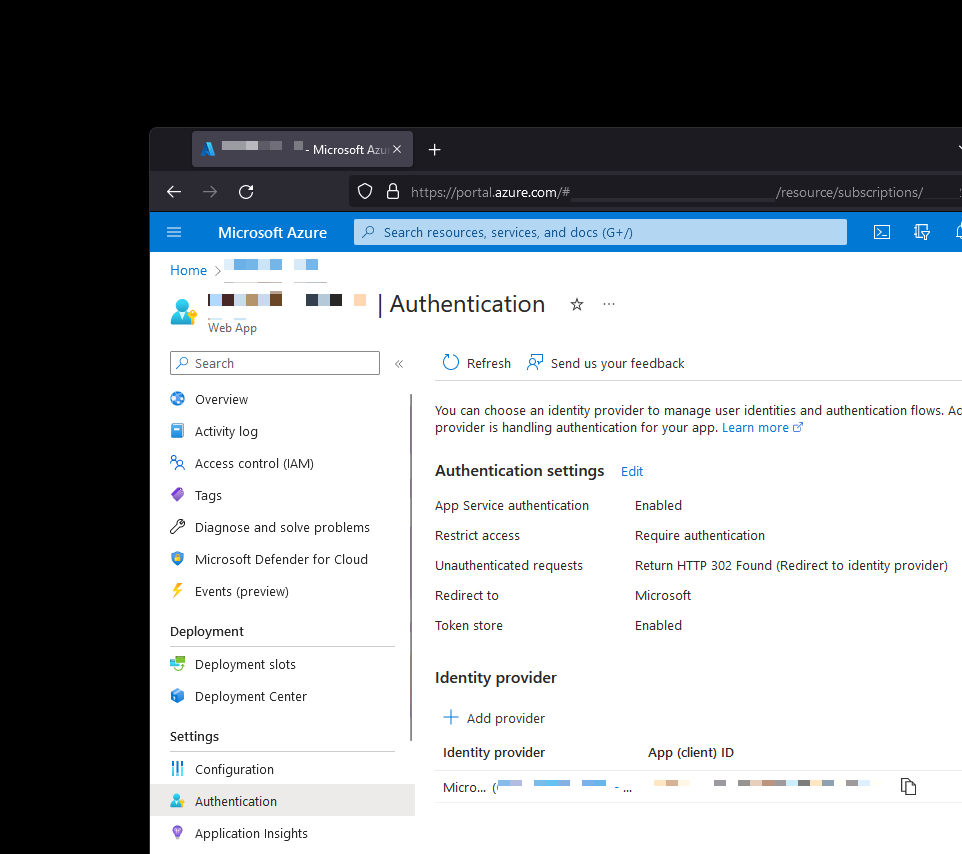
In my case I only wanted Microsoft Accounts (MSA) to have access. No problem - when creating the application I can correctly set that the registration should support Azure AD and MSA accounts. However, I had another wrench to throw - I didn’t want just any Microsoft account to be able to log in to the website but only accounts that I allow-list.
When authentication is enabled through AAD, a new Enterprise Application registration is created that is bound to the web application. Said application can be customized with a number of bells and whistles, including the ability to control access based on user assignment.
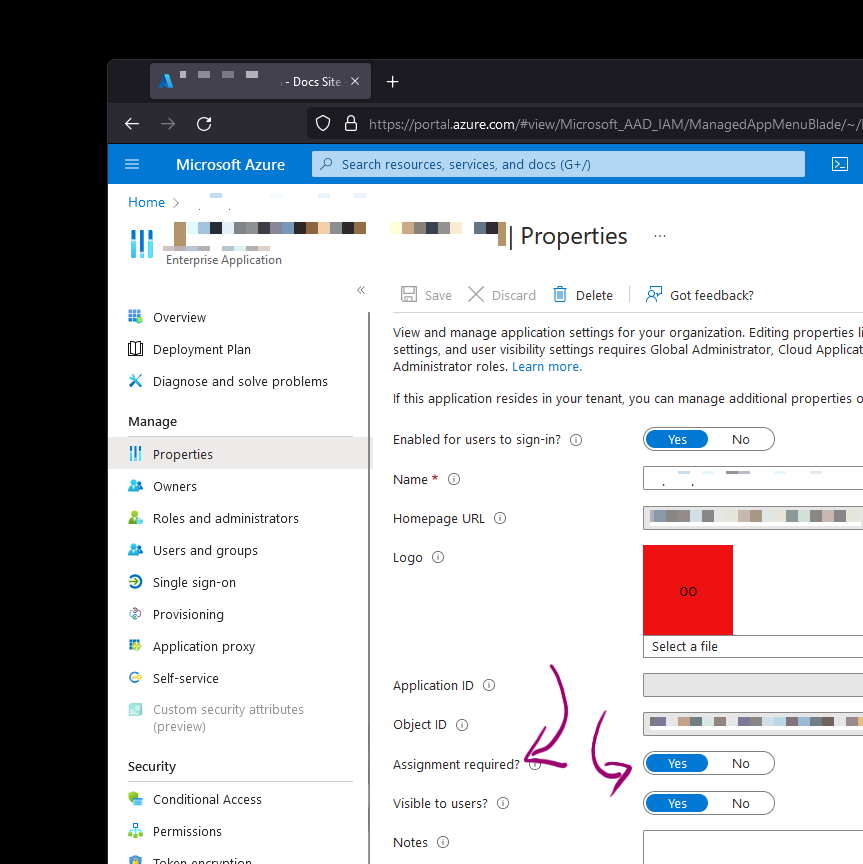
The challenge with this functionality stems from the fact that you can’t really control assignment for MSAs, which is a problem - I do want to control MSA assignment. After going through the documentation for a bit it didn’t seem like many people wanted to do what I had in mind, so I started looking into the underlying APIs. And that’s where something emerged - customized authorization policies through the App Service authentication V2 API. This little chunk of JSON caught my attention:
"allowedPrincipals": {
    "identities": []
}
Could it be that I can hand-craft a list of identities that can access my site? The documentation is explicit about how I can tweak this setting:
Currently, the only way to configure these built-in checks is via Azure Resource Manager templates or the REST API.
The documentation is also explicit as to what identities represents:
An allowlist of string object IDs representing users or applications that have access. When this property is configured as a nonempty array, the
allowedPrincipalsrequirement can be satisfied if the user or application represented by the request is specified in the list.This policy evaluates the
oidclaim of the incoming token. See the Microsoft Identity Platform claims reference.
If you’ve worked with Azure Active Directory before, getting an object ID is not complicated as it’s available for every registered user right from the Azure Portal.
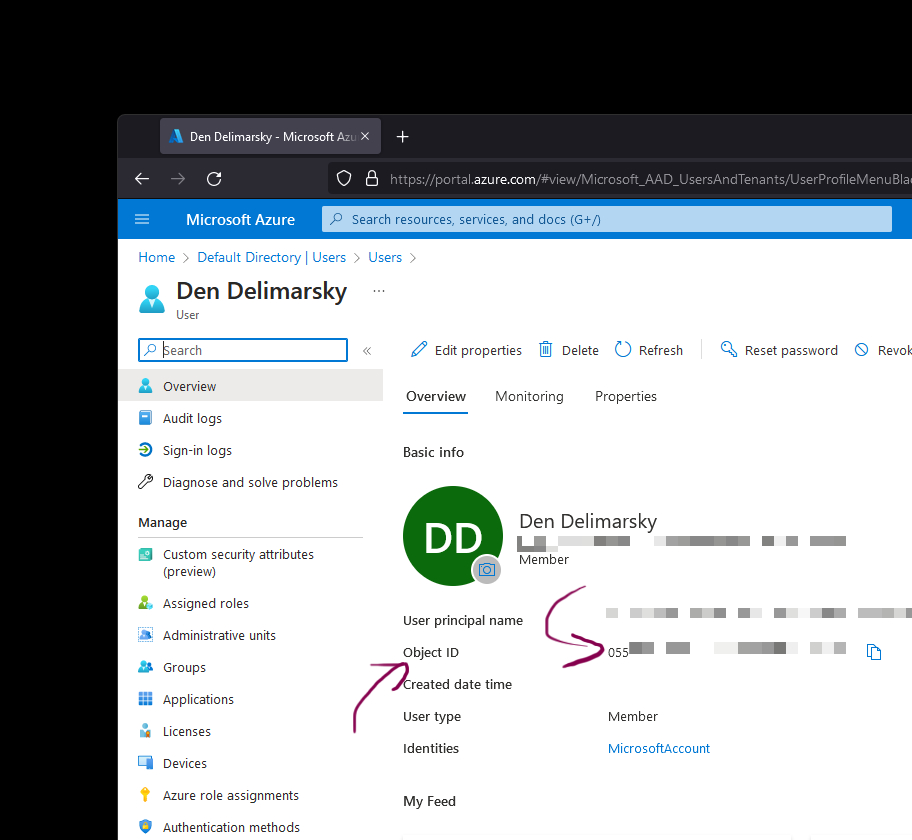
You can also get this ID if you use the Microsoft Graph API through PowerShell, cURL, or any other approach to sending REST requests.
Things do become a bit more interesting when we start dealing with MSAs, though - we don’t have access to object IDs for random users because they are not part of my tenant. But I still need the object ID to make sure that I do restrict the access - so how do I do this? For this, let’s take a trip down to the Microsoft identity platform documentation, specifically to the ID Tokens - the section that deals with payload claims.
The application we have registered in AAD uses the v2.0 endpoint to get the token:
https://login.microsoftonline.com/common/oauth2/v2.0/token
As part of that, a very special claim is embedded into to the token - the oid we saw referenced earlier. It’s defined as:
The immutable identifier for an object in the Microsoft identity system, in this case, a user account. This ID uniquely identifies the user across applications - two different applications signing in the same user will receive the same value in the
oidclaim. The Microsoft Graph will return this ID as the id property for a given user account. Because theoidallows multiple apps to correlate users, the profile scope is required to receive this claim. Note that if a single user exists in multiple tenants, the user will contain a different object ID in each tenant - they’re considered different accounts, even though the user logs into each account with the same credentials. Theoidclaim is a GUID and cannot be reused.
It seems that we have the chance to actually see the oid if we extract it from the token that we get from the authentication endpoint. Sure enough, if you fire up Fiddler during an authentication session, you will notice the id_token containing a JSON Web Token (JWT).
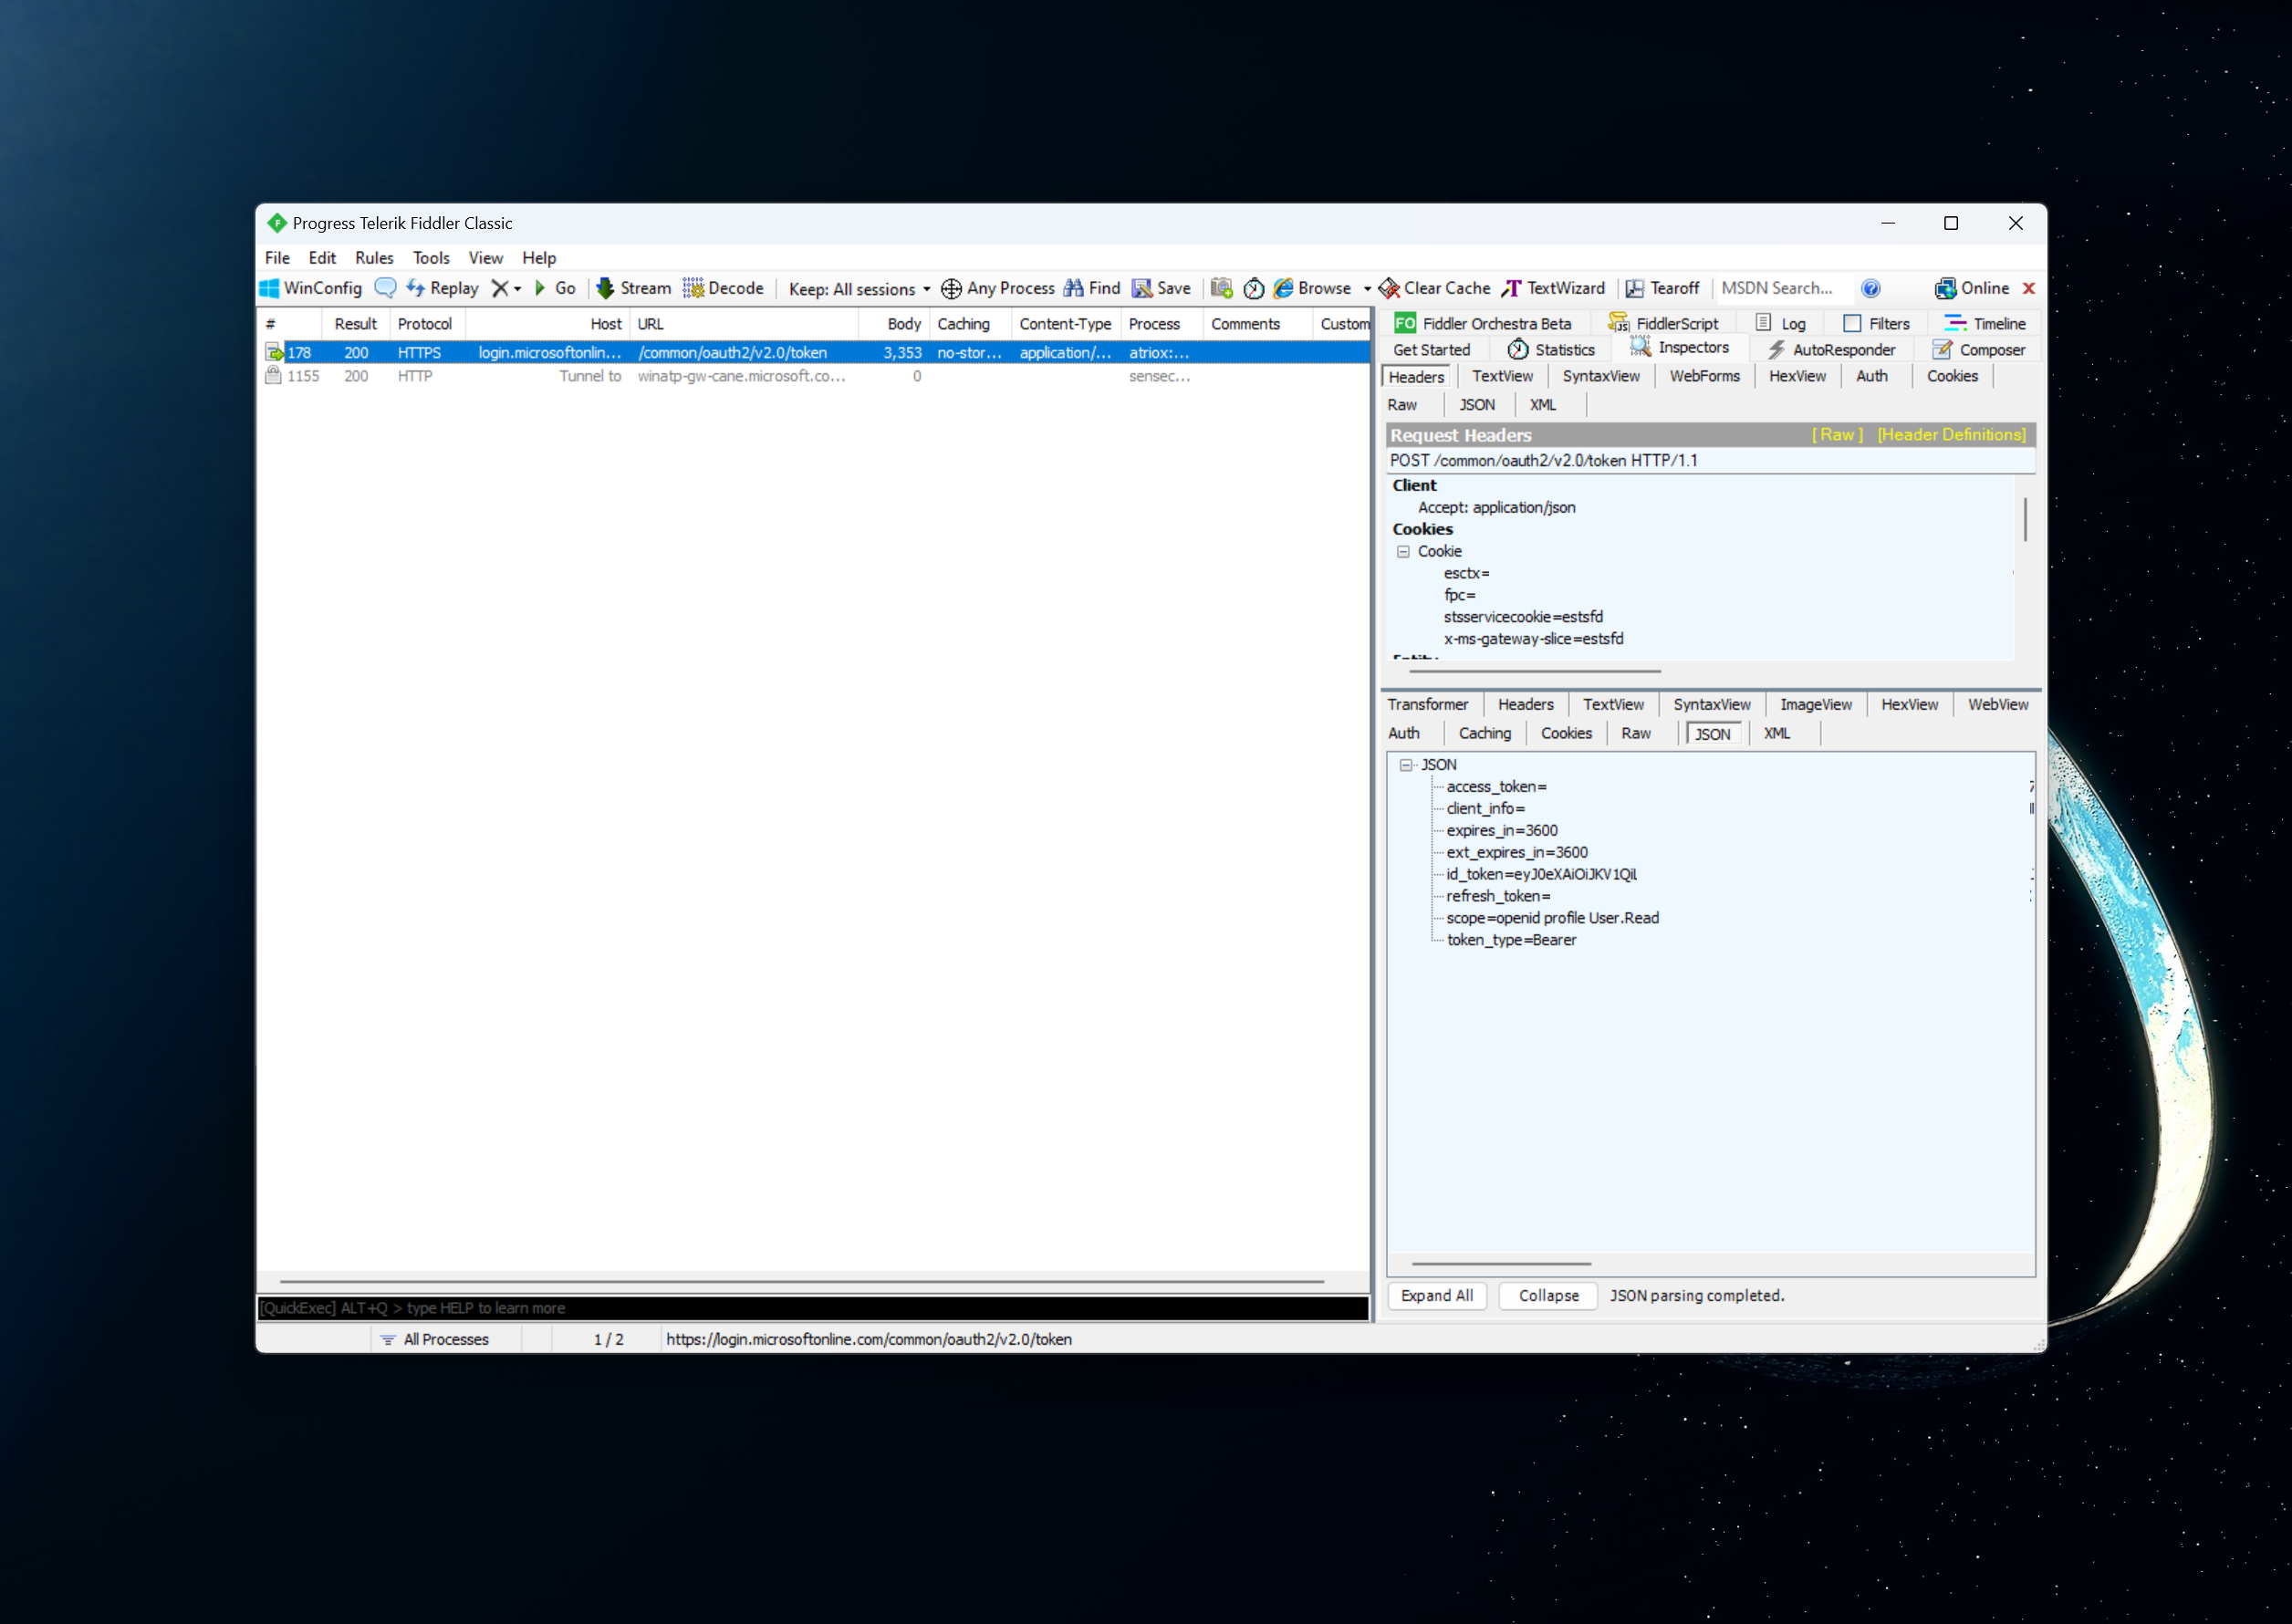
To see the oid you can decode the JWT by splitting it (use the period character, ., as the delimiter) and then decoding the Base64-encoded payload.
Never paste your JWT tokens into unknown websites or apps that parse them. A JWT token can be used to authenticate a user and in the wrong hands it means a compromised account.
To parse the JWT token with PowerShell you can apply this technique (payload follows the header, and therefore has an index of 1 in the split string array):
$tokenData = "YOUR_ID_TOKEN"
$tokenPayload = $tokenData.Split(".")[1]
[System.Text.Encoding]::UTF8.GetString(
    [System.Convert]::FromBase64String($tokenPayload + "==")
) | ConvertFrom-Json
Sure enough, the oid is there.
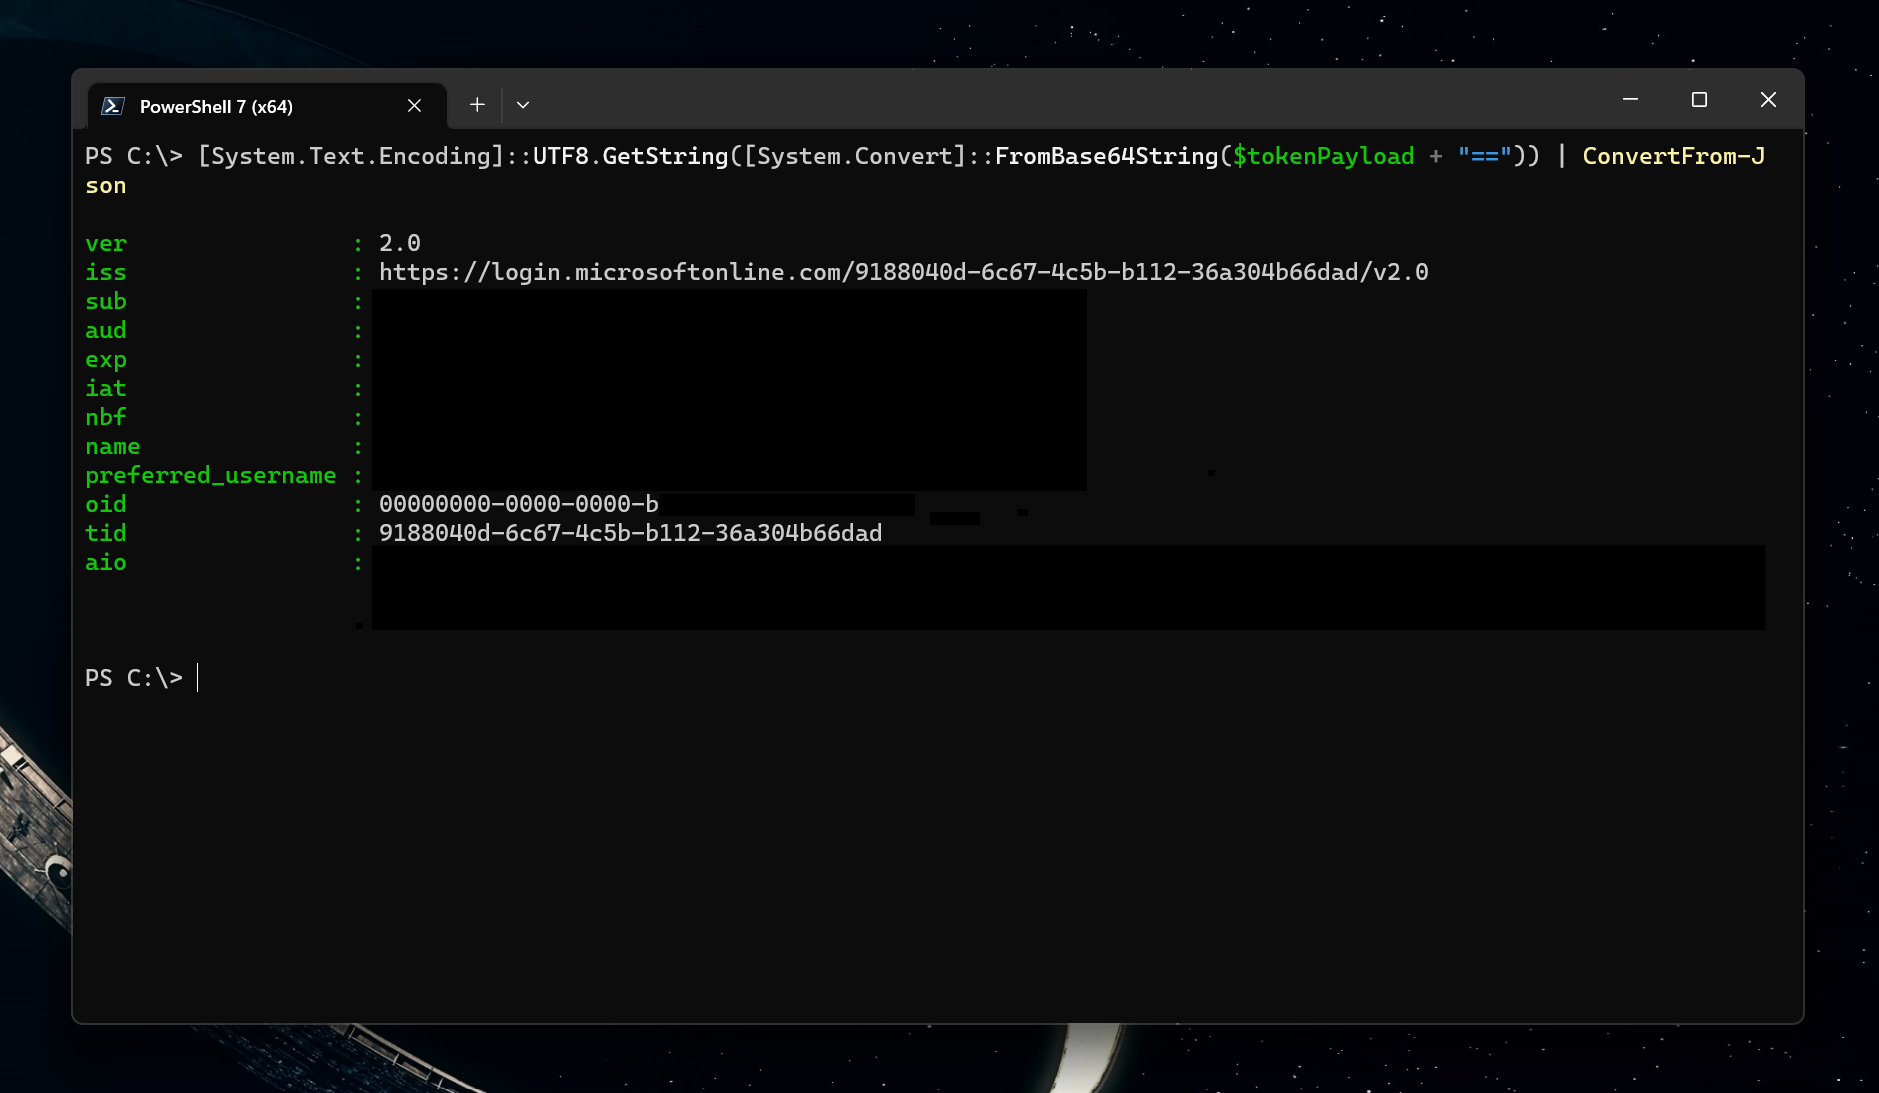
There are two other ways in which you can get the same OID. One way is to use the Microsoft Graph Explorer, log in with your Microsoft Account, and send a request to /me. You should then get a response that contains an id property in the JSON:
{
    "@odata.context": "https://graph.microsoft.com/v1.0/$metadata#users/$entity",
    "displayName": "YOUR_DISPLAY_NAME",
    "surname": "YOUR_SURNAME",
    "givenName": "YOUR_GIVEN_NAME",
    "id": "abc1234567e8c9e0",
    "userPrincipalName": [email protected],
    "businessPhones": [],
    "jobTitle": null,
    "mail": null,
    "mobilePhone": null,
    "officeLocation": null,
    "preferredLanguage": null
}
But wait a second - the ID we got is definitely not a GUID. Worry not - the object ID will match that we got from the /token endpoint. All that we need to do is pad the identifier with zeroes to match a real GUID. So, if a GUID has the following structure:
00000000-0000-0000-0000-000000000000
We make our ID to be:
00000000-0000-0000-abc1-234567e8c9e0
Congratulations - this is now an oid.
The better alternative that I would actually recommend is to use the Microsoft Authentication Library. In my case, I built a simple public client application that would allow me to take my credentials and look into the claims through managed, easy-to-read, C# code.
var pca = PublicClientApplicationBuilder.Create("APP_ID")
            .WithRedirectUri("REDIRECT_URL")
            .Build();

var authResult = await pca.AcquireTokenInteractive(
  new[] { "User.Read" }
).ExecuteAsync();

MessageBox.Show(authResult.Account.HomeAccountId.ObjectId);
If I set the breakpoint (or wait for the message box to appear), I will get the object ID.

The only way to obtain a user's oid is by having the user authenticate and then look for the relevant data in the token response. There is no API that can map MSAs to object IDs without the specific user authenticating.
Great - we’ve done all the work to get the object IDs. That still leaves us looking for the solution to the problem this blog post started from - restricting who can access my Azure App Service-hosted web application. Per the earlier guidance, it seems that I could use the REST API, but I don’t want to fiddle with Postman every single time I need to add a new object ID to the allow list. Lucky for me, there is an alternative - the Azure Resource Explorer (which, by the way, is open-source).
Azure Resource Explorer is a nifty tool that allows me to read and modify resource configurations. Guess what falls under this umbrella? The App Service authentication V2 API. To find it, I had to expand my subscription, find the resource group, then the Microsoft.Web provider, which contained a sites section with my site, which then had a config section with a authsettingsV2 page.
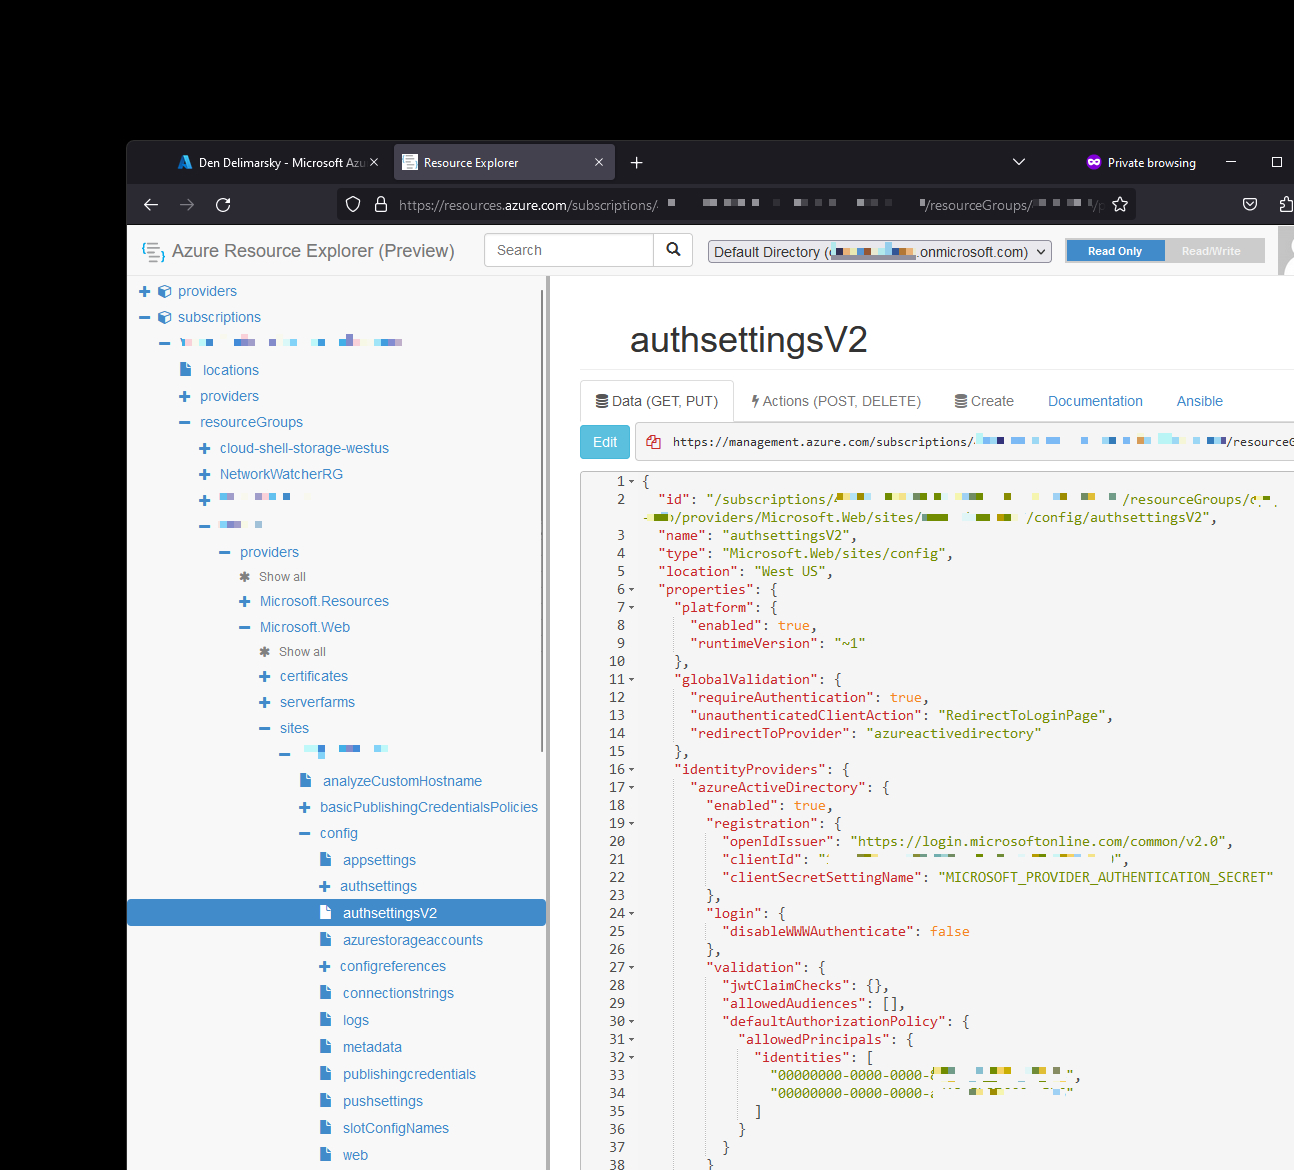
Notice the identities array that contains two GUIDs - those are the user account object IDs that I’ve allowed to access the site. Both accounts are MSAs mapped to their own oid values. To add or remove new accounts, I can do it programmatically or I can switch the Azure Resource Explorer into Read/Write mode, append the GUIDs to the JSON, and then save the changes right from the web browser.
If you're going to use the REST API for this change, make sure that you PUT the whole JSON file with the configuration and not just the validation blob shown in the docs. Doing so will blow away your authentication settings completely and you will have to re-bind the application to the web app.
That’s about it - now anyone that accesses my site with an MSA that is now allow-listed will get the prompt to give permissions to the Azure AD app, but beyond that they will get an instant error message that tells them that they are not allowed to see the content.