Collecting And Analyzing Halo Stats - With Azure, SQLite, Python, And GitHub
Table of Contents
As I am building out my OpenSpartan project as the experience to analyze stats for Halo Infinite, I wanted to have a quicker way to analyze my in-game performance. There are tools like Halo Tracker or even Halo Waypoint, but I kept hitting the same problem - there just isn’t enough detail in what I am trying to look at. Maybe it’s part of my product manager mentality where I want to get the full quantitative picture, but I thought that for me to properly get an understanding of how I improve over time I needed to get a hold of my own metrics. This led to the creation of my own Halo stats page on this site. This post is all about the infrastructure and the underlying logic of what I have put together.
Overview #
Before we start off, I want to say that as you read through the things I’ve done, you might get the impression that this is all held by super glue and silly string. It kind of is, but I never intended to build this for production. It’s meant to be a locally-optimized implementation that works for me to quickly peek at my match data. If you’re looking at this as inspiration for what your production infrastructure should look like, you might end up in a world of hurt.
Infrastructure pieces #
The bulk of the infrastructure is captured in the title of this blog post, but I would still like to elaborate on why I’ve decided to use each piece of this somewhat messy puzzle.
Azure Batch #
I needed to collect the Halo match data on a schedule. The Halo Infinite API is structured in such a way that there is no publicly available bulk, “give me everything at once,” endpoint. Instead, I need to queue jobs that will regularly obtain my profile, get the list of matches I’ve participated in, and then for each match obtain the relevant details through another endpoint. With Azure Batch, I can queue up jobs to run on a schedule within a pre-defined compute pool, which is effectively a set of virtual machines where I have full flexibility over their configuration without the hassle of actually dealing with virtual machines.

Wouldn't using Azure Batch be more costly than using something like GitHub Actions, where you can pay a flat $5/mo fee for GitHub Pro and get extra minutes?
Depending on the virtual machine used for the compute pool configuration, yes - it can be a bit pricey! However, because I have a limited number of Azure credits per month thanks to a Visual Studio Enterprise subscription, along with using a very small VM, Standard_A1_v2, I can keep my costs down. While I could use GitHub Actions for smaller jobs, once I start running them on a frequent schedule (and in this case, I want to get my stats with some regularity) I will run out of minutes for GitHub Actions really quickly. For my job that acquires stats I need to run it every two hours. Well, not that I need to - I want to. In the best case scenario, every run takes two to three minutes, but in the worst it can take up to seven or even ten. Let’s think worst case scenario - that’s 120 minutes per day, with 30 days in a month, that means 3,600 minutes a month just on stats acquisition. I have different plans for GitHub Actions, so I thought I’d save my minutes here.
SQLite #
I chose SQLite because it’s cheap and easy to use. It’s not necessarily cloud-friendly in that there is no easy way to just host it inside a cloud provider - you would need an actual SQL or document database, or rely on some very esoteric workarounds, or even specialized services like dbhub.io. This is not inherently bad, though, as you will see further in this article - I wasn’t planning on building an extremely high-performance workflow here, so some compromises were made. As an added bonus, SQLite also works splendidly on the local development machine, which means that at any point I can pull the database file locally and start querying it from my environment of choice without much friction.
Azure Storage #
The SQLite file, once filled with data, is then dropped inside a Azure Blob Storage container. That simple - when the Azure Batch job runs, it pulls the latest version of the file, introduces new data, and then re-uploads it to Azure Storage.
Azure Storage is also where I keep the automatically generate graphs that are effectively visualizations of metrics I produce from the SQLite database file.
GitHub Actions #
GitHub Actions are used to regularly pull the data from the SQLite file that is stored inside Azure Storage and produce the Markdown version of all the interesting metrics, but on a significantly less frequent cadence. As a matter of fact, the action runs only twice a day - once in the morning, and once in the evening.
Hugo #
I use Hugo to publish my blog to Azure Static Web Apps. It’s quite literally the simplest and most performant static site generator that I’ve used in my career - it takes Markdown and spits out HTML. Neat.
Python and Jupyter #
I alluded to this earlier, but one of the big pieces that I needed to have for this experiment is having a way to locally run and test the data and the resulting metrics. The easiest way to do that was by using Python, which has built-in support for SQLite. The nice thing about a Python-centric experience is that I can use Jupyter notebooks in a few command line executions that can also present me the data with fancy charts with the help of the pandas and seaborn packages.

And it would seem that the added benefit of this setup is that you can use it on any platform almost natively!
Exactly! I am very much a cross-platform kind of tinkerer, so if I use Python and Jupyter notebooks, I can be confident that I can easily experiment across platforms in the exactly same way. Not that there aren’t languages and platforms that are just as effective, but coupled with my familiarity of the Python ecosystem and it’s heavy use by the data science community (which means - more tools and community help) this was an easy choice.
The database #
Let’s talk a bit about how data is stored. I mentioned earlier that I am using SQLite, which is a powerful tool that enables me to create one data file and then insert and query data to and from it with the help of standard SQL queries. As an added benefit, SQLite also works really well with JSON. That’s important because the Halo Infinite API supports returning data in many formats, JSON being one of them. I wanted to spend very little time fiddling with data extraction and insertion, and luckily SQLite supports JSON functions and operators natively, effectively making it a document database.
All of this is a long way of saying that I could define my tables in such a way that I can just pass JSON responses directly into the table for insertion and SQLite will handle the proper sequencing of properties. Here is the whole table creation script:
CREATE TABLE MatchStats (
   ResponseBody TEXT,
   MatchId Text GENERATED ALWAYS AS (json_extract(ResponseBody, '$.MatchId')) VIRTUAL,
   MatchInfo Text GENERATED ALWAYS AS (json_extract(ResponseBody, '$.MatchInfo')) VIRTUAL,
   Teams Text GENERATED ALWAYS AS (json_extract(ResponseBody, '$.Teams')) VIRTUAL,
   Players Text GENERATED ALWAYS AS (json_extract(ResponseBody, '$.Players')) VIRTUAL);

CREATE TABLE PlayerMatchStats (
  ResponseBody TEXT,
  MatchId TEXT,
  PlayerStats Text GENERATED ALWAYS AS (json_extract(ResponseBody, '$.Value')) VIRTUAL
)

CREATE TABLE PlayerRankSnapshots (
  ResponseBody TEXT,
  PlaylistId TEXT,
  SnapshotTimestamp DATETIME,
  Snapshot Text GENERATED ALWAYS AS (json_extract(ResponseBody, '$.Value')) VIRTUAL
)

CREATE TABLE ServiceRecordSnapshots (
  ResponseBody TEXT,
  SnapshotTimestamp DATETIME,
  Subqueries Text GENERATED ALWAYS AS (json_extract(ResponseBody, '$.Subqueries')) VIRTUAL,
  TimePlayed Text GENERATED ALWAYS AS (json_extract(ResponseBody, '$.TimePlayed')) VIRTUAL,
  MatchesCompleted Text GENERATED ALWAYS AS (json_extract(ResponseBody, '$.MatchesCompleted')) VIRTUAL,
  Wins Text GENERATED ALWAYS AS (json_extract(ResponseBody, '$.Wins')) VIRTUAL,
  Losses Text GENERATED ALWAYS AS (json_extract(ResponseBody, '$.Losses')) VIRTUAL,
  Ties Text GENERATED ALWAYS AS (json_extract(ResponseBody, '$.Ties')) VIRTUAL,
  CoreStats Text GENERATED ALWAYS AS (json_extract(ResponseBody, '$.CoreStats')) VIRTUAL,
  BombStats Text GENERATED ALWAYS AS (json_extract(ResponseBody, '$.BombStats')) VIRTUAL,
  CaptureTheFlagStats Text GENERATED ALWAYS AS (json_extract(ResponseBody, '$.CaptureTheFlagStats')) VIRTUAL,
  EliminationStats Text GENERATED ALWAYS AS (json_extract(ResponseBody, '$.EliminationStats')) VIRTUAL,
  ExtractionStats Text GENERATED ALWAYS AS (json_extract(ResponseBody, '$.ExtractionStats')) VIRTUAL,
  InfectionStats Text GENERATED ALWAYS AS (json_extract(ResponseBody, '$.InfectionStats')) VIRTUAL,
  OddballStats Text GENERATED ALWAYS AS (json_extract(ResponseBody, '$.OddballStats')) VIRTUAL,
  ZonesStats Text GENERATED ALWAYS AS (json_extract(ResponseBody, '$.ZonesStats')) VIRTUAL,
  StockpileStats Text GENERATED ALWAYS AS (json_extract(ResponseBody, '$.StockpileStats')) VIRTUAL
)

CREATE TABLE MedalMetadata (
  ResponseBody TEXT,
  SnapshotTimestamp DATETIME,
  Difficulties Text GENERATED ALWAYS AS (json_extract(ResponseBody, '$.difficulties')) VIRTUAL,
  Types Text GENERATED ALWAYS AS (json_extract(ResponseBody, '$.types')) VIRTUAL,
  Sprites Text GENERATED ALWAYS AS (json_extract(ResponseBody, '$.sprites')) VIRTUAL,
  Medals Text GENERATED ALWAYS AS (json_extract(ResponseBody, '$.medals')) VIRTUAL
)
This can look convoluted at first glance, but trust me - it’s simpler than it seems. For every table relevant to my stats interests, like match stats, specific stats parameters per match, rank snapshots, service record snapshots, and medal details, I have a ResponseBody property that contains the raw JSON blob, and then each other property is automatically generated from a JSON path defined through json_extract.
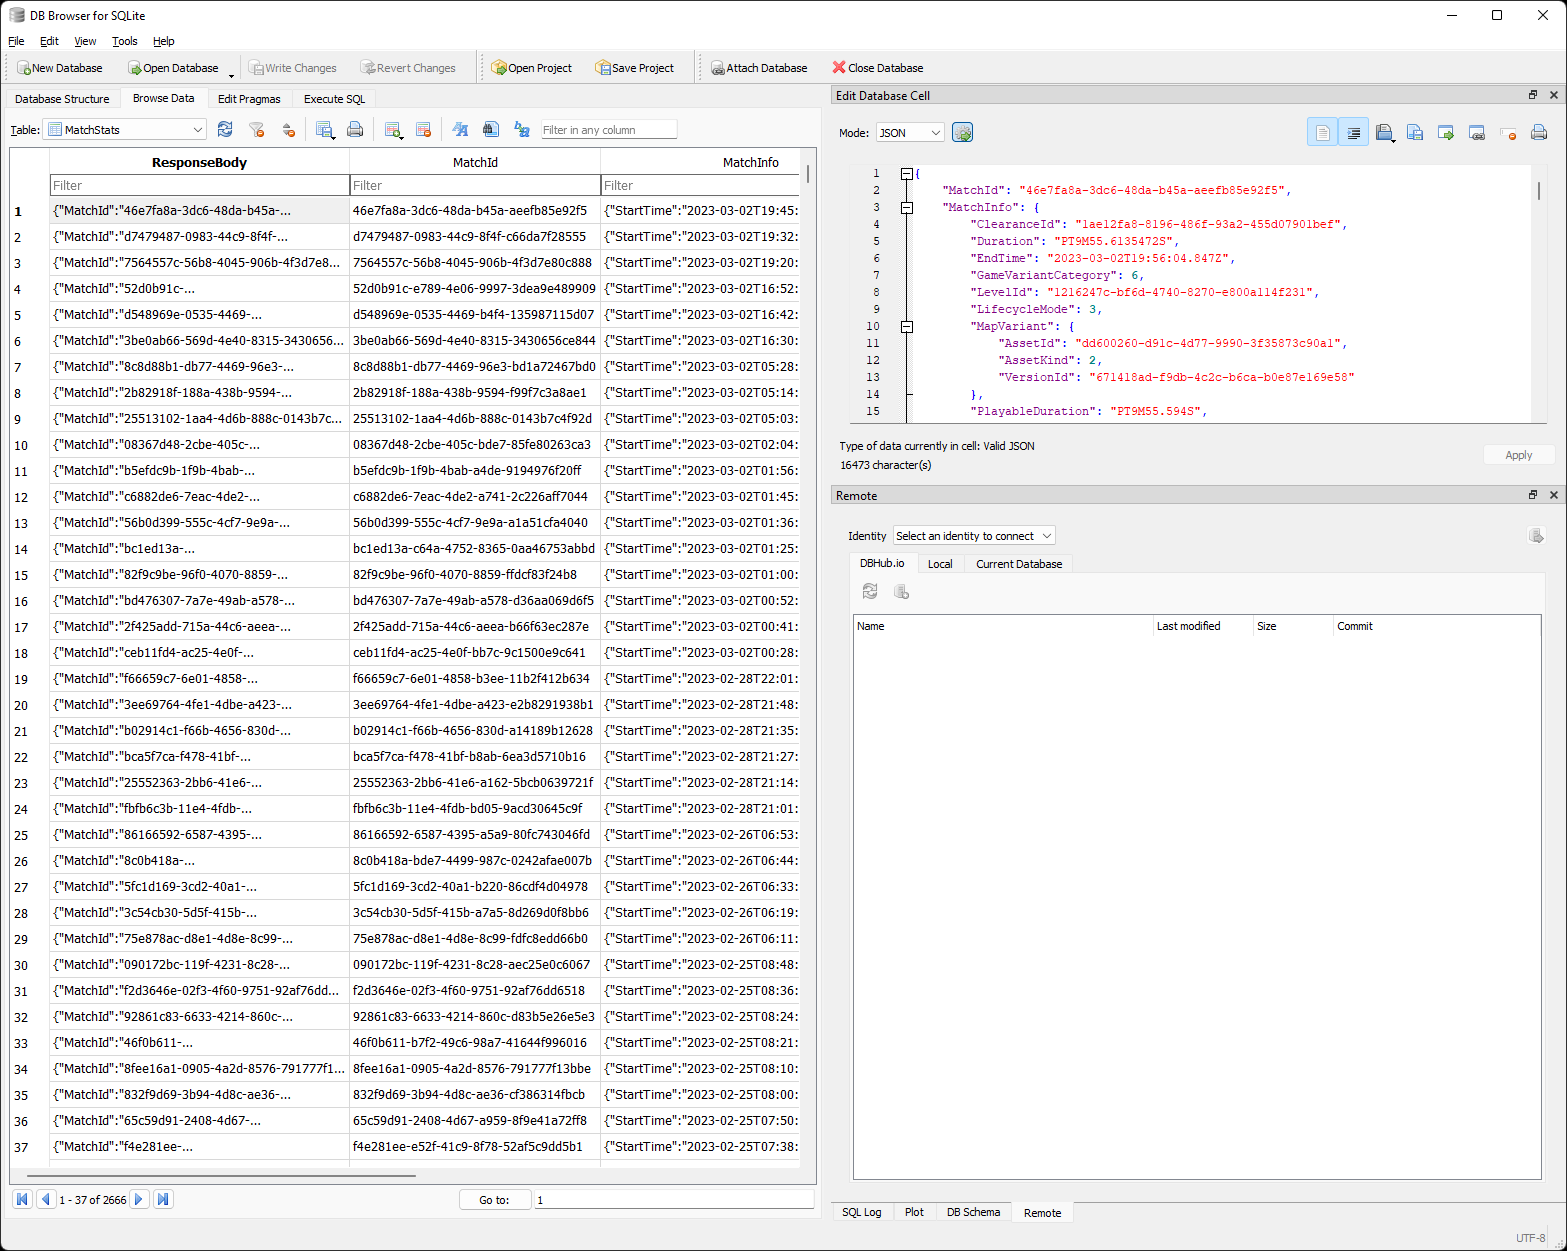
That’s it - that’s the database. It fulfills my requirement for simplicity quite well. When the file is created, it’s uploaded to Azure Blob Storage where it can be used by the automation jobs. When used locally, I can use a tool like DB Browser for SQLite to quickly validate and analyze what I have without hassle.
Azure Batch & scheduled jobs #
Azure Batch, in turn, will take the database from Azure Blob Storage, along with some of the helper scripts that pre-provision the compute nodes with the relevant tools, such as .NET Runtime (since the data collection tooling is written in .NET) and the “magic sauce” data aggregation CLI that talks to the Halo Infinite API to get my own data. The basic scaffolding logic is captured in a shell script:
# Install the Azure CLI
curl -sL https://aka.ms/InstallAzureCLIDeb | sudo bash

# Update packages
sudo apt-get update
sudo apt-get install -y dotnet-sdk-6.0
sudo apt-get install -y unzip
echo "Wrapped up scaffolding"
After provisioning is done, I use the data collection script to run the data snapshot acquisition:
az login --identity --debug --verbose

unzip /$AZ_BATCH_TASK_WORKING_DIR/bin/composer-bin.zip -d composer

echo "Logged in with Azure."

SAS_TOKEN=$(az keyvault secret show --name MY_SAS_TOKEN --vault-name MY_VAULT_NAME --query value -o tsv)
CLIENT_ID=$(az keyvault secret show --name MY_CLIENT_ID --vault-name MY_VAULT_NAME --query value -o tsv)
CLIENT_SECRET=$(az keyvault secret show --name MY_CLIENT_SECRET --vault-name MY_VAULT_NAME --query value -o tsv --debug --verbose)

echo "Got the SAS token."

az keyvault secret show --name MY_ACCOUNT_SECRET --vault-name MY_VAULT_NAME --query value -o tsv --debug --verbose >> /$AZ_BATCH_TASK_WORKING_DIR/composer/net6.0/tokens.json

echo "Wrote to file."

cd /$AZ_BATCH_TASK_WORKING_DIR/composer/net6.0

dotnet Den.Dev.Orion.Composer.dll refresh --client-id $CLIENT_ID --client-secret $CLIENT_SECRET --redirect-url 'https://localhost:3000'

dotnet Den.Dev.Orion.Composer.dll get matches --is-xuid-file false --xuid "MY_XUID" --domain /$AZ_BATCH_TASK_WORKING_DIR/data/store.db

dotnet Den.Dev.Orion.Composer.dll get rank --playlist-id "RANKED_PLAYLIST_ID" --xuid "MY_XUID" --domain /$AZ_BATCH_TASK_WORKING_DIR/data/store.db

dotnet Den.Dev.Orion.Composer.dll get sr --is-xuid-file false --xuid "MY_XUID" --domain /$AZ_BATCH_TASK_WORKING_DIR/data/store.db

dotnet Den.Dev.Orion.Composer.dll get medalmetadata --domain /$AZ_BATCH_TASK_WORKING_DIR/data/store.db

az keyvault secret set --name MY_ACCOUNT_SECRET --vault-name MY_VAULT_NAME --file tokens.json -o none

az storage blob upload -f /$AZ_BATCH_TASK_WORKING_DIR/data/store.db --blob-url $SAS_TOKEN --overwrite

rm -rf /$AZ_BATCH_TASK_WORKING_DIR/data
rm /$AZ_BATCH_TASK_WORKING_DIR/composer/net6.0/tokens.json
rm -rf /$AZ_BATCH_TASK_WORKING_DIR/composer
rm -rf /$AZ_BATCH_TASK_WORKING_DIR/bin
This script uses the composer CLI that I built to acquire stats using the details about the client that I store and update in Azure Key Vault. I am logging in using Azure Managed Identity, that is properly assigned to both the compute pool and the Azure Key Vault.
Every time it runs, it gets stats on my matches, a snapshot of my rank as measured against the Ranked Arena playlist, a snapshot of the overall service record, and lastly - the medal metadata. The newly refreshed tokens are then stored for re-use and the database is uploaded back to Azure Blob Storage.

Erm... You're just ferrying the data file back and forth on every run? Wouldn't that become quite costly over time, especially as the database grows?
The good news is that the database is fairly small. I’ve been running the job regularly since March of this year, only to end up with a 277MB data file:
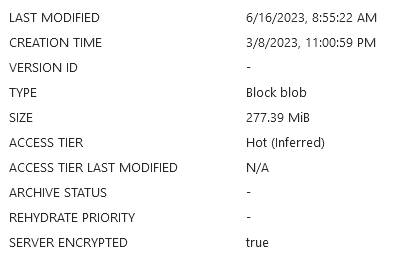
This is shockingly good, given the regularity with which I pull new data - the job runs every two hours.
Now, I want to draw attention to another feature of Azure Batch that I found quite nifty - JSON-based configuration. Directly from the Azure Portal (you can use code as well - I just like using the Portal), I can click on Add when configuring job schedules and switch directly to the JSON editor where I can provide a pre-configured job definition.
The job definition can take shape like the snippet below:
{
    "schedule": {
        "startWindow": null,
        "recurrenceInterval": "PT2H"
    },
    "jobSpecification": {
        "constraints": {
            "maxWallClockTime": "PT1H",
            "maxTaskRetryCount": 0
        },
        "jobManagerTask": {
            "id": "StatCollectionJob",
            "commandLine": "/bin/sh -c \". /$AZ_BATCH_TASK_WORKING_DIR/bin/jobprep.sh && . /$AZ_BATCH_TASK_WORKING_DIR/bin/statcollect.sh\"",
            "resourceFiles": [
                {
                    "storageContainerUrl": "",
                    "blobPrefix": "bin/jobprep.sh",
                    "fileMode": "777"
                },
                {
                    "storageContainerUrl": "",
                    "blobPrefix": "bin/statcollect.sh",
                    "fileMode": "777"
                },
                {
                    "storageContainerUrl": "",
                    "blobPrefix": "bin/composer-bin.zip",
                    "fileMode": "777"
                },
                {
                    "storageContainerUrl": "",
                    "blobPrefix": "playstore.db",
                    "fileMode": "777"
                }
            ],
            "constraints": {
                "maxWallClockTime": "PT1H",
                "retentionTime": "PT40M",
                "maxTaskRetryCount": 0
            },
            "requiredSlots": 1,
            "userIdentity": {
                "username": null,
                "autoUser": {
                    "scope": "pool",
                    "elevationLevel": "admin"
                }
            },
            "applicationPackageReferences": []
        },
        "poolInfo": {
            "poolId": "opsp-compute"
        },
        "onAllTasksComplete": "terminatejob",
        "onTaskFailure": "noaction"
    },
    "id": "PlayerStatCollectionSchedule",
    "displayName": "PlayerStatCollectionSchedule"
}
The configuration above will set the two-hour cadence, determine max execution time, as well as provide the required details to pull the relevant job preparation and execution scripts from Azure Blob Storage (I omitted the container URLs for obvious reasons).
Local analysis with Jupyter #
Because I have a compact SQLite file, I can quickly peek at the data locally and even try to generate fancy charts to see what they would look like before programming them into the automation job that will push things to my website. It’s a matter of creating a new Python environment, installing the required libraries (like pandas and seaborn), and then running jupyter notebook.
Inside the notebook itself, I can use the built-in libraries to query data from the SQLite database file, like this:
statement = '''WITH RAW_COLLECTION AS (
               SELECT json_extract(MatchInfo, '$.Duration') MatchDuration, MatchId FROM MatchStats)

               SELECT * FROM RAW_COLLECTION'''

df = pd.read_sql_query(statement, data_connection)
df['MatchDuration'] = pd.to_timedelta(df['MatchDuration']).dt.total_seconds()/60
df.head(10)
The output of snippets such as the one above can then be used for visualization, like this:
sns.histplot(data=df, x="MatchDuration", kde=True, color='steelblue')
plt.show()
Generally, I’ve found this approach to work really well when I need to have a gut check on the data - there were cases where I was wondering if things are incomplete or incorrect, and I didn’t want to wait until the next automation run, so I would use a storage client to pull the latest version of the database file and run a few quick queries and visualizations on it.
GitHub Actions for generating the stats page #
The last piece of the puzzle is how it all is pushed to my website. The process is fairly brute-ish, to be honest. I have a GitHub Action definition that looks like this:
name: "Create image snapshots of the stats"

on:
  repository_dispatch:
  workflow_dispatch:
  schedule:
  - cron: '0 11,23 * * *'

jobs:
  build:
    environment: Production
    runs-on: ubuntu-latest
    name: Build

    steps:
    - uses: actions/checkout@v2

    - uses: actions/checkout@v2
      with:
        repository: dend/blog
        token: ${{ secrets.SL_BLOG_TOKEN }}
        path: blog

    - name: 🐍 Set up Python
      uses: actions/setup-python@v4
      with:
        python-version: "3.11"

    - name: 🔗 Install dependencies
      working-directory: snapshotmaker
      run: |
        python -m pip install --upgrade pip
        pip install -r requirements.txt

    - name: 🔒 Azure Login
      uses: azure/login@v1
      with:
        creds: ${{ secrets.SL_AZURE_CREDENTIALS }}
        enable-AzPSSession: true

    - name: 🌎 Download SQLite DB from Azure Storage
      uses: azure/powershell@v1
      with:
        azPSVersion: "latest"
        inlineScript: |
          $StorageAccountName = 'MY_STORAGE_ACCOUNT_NAME'
          $StorageAccountKey = (Get-AzStorageAccountKey -ResourceGroupName 'MY_RESOURCE_GROUP' -Name $StorageAccountName)[0].Value
          $Context = New-AzStorageContext -StorageAccountName $StorageAccountName -StorageAccountKey $StorageAccountKey
          Get-AzStorageBlobContent -Blob 'data/store.db' -Container 'MY_CONTAINER_NAME' -Context $Context -Destination MY_DESTINATION_FOLDER

    - name: 📷 Run snapshot maker
      working-directory: snapshotmaker
      run: |
        python sm.py data/store.db ../blog/dennisdel/content/halo.md

    - name: 🌎 Upload data to Azure Storage
      uses: azure/powershell@v1
      with:
        azPSVersion: "latest"
        inlineScript: |
          $StorageAccountName = 'MY_STORAGE_ACCOUNT_NAME'
          $StorageAccountKey = (Get-AzStorageAccountKey -ResourceGroupName 'MY_RESOURCE_GROUP' -Name $StorageAccountName)[0].Value
          $Context = New-AzStorageContext -StorageAccountName $StorageAccountName -StorageAccountKey $StorageAccountKey
          $filesToUpload = Get-ChildItem MY_DESTINATION_FOLDER/.media -Recurse -File

          foreach ($x in $filesToUpload) {
              $targetPath = "snapshots\" + (Split-Path $x.fullname -Leaf)

              Set-AzStorageBlobContent -Blob $targetPath -Container 'MY_CONTAINER_NAME' -Context $Context -File $x.fullname -Properties @{"ContentType" = "image/png"} -Force
          }

    - name: ✅ Commit blog changes
      working-directory: blog
      run: |
        git add -A -v
        git config --global user.name 'Den Delimarsky'
        git config --global user.email 'MY@EMAIL'
        git pull origin master
        git commit -m "Updating latest Halo snapshot."
        git push origin master
The action sets everything up for a working Python environment, install all the dependencies, logs in with Azure (with a secret that I provisioned inside GitHub), downloads the SQLite database file inside the container and then runs sm.py (which mirrors the Jupyter notebook that I have in place in terms of functionality), and then uploads the generated images to Azure Blob Storage, where those same images are later served on my website through Azure CDN. Because I keep all the image names consistent, the site automatically picks them up (the URLs are immutable) on the latest version. The snippet that converts the generated plot into an image looks like this:
save_path = os.path.join(plot_path, 'correlation_accuracy_timeofday.png')
plt.savefig(save_path, facecolor='white', dpi=plt.gcf().dpi)
plt.close()
As I said - Python and its data-related ecosystem makes my job extremely easy as I can use a lot of the built-in capabilities to produce great-looking visualizations.
Conclusion #
That’s about it for how the stats are captured and then rendered on the site. Definitely not the most production-ready implementation, but it gets the job done and is fairly easy to tweak and debug.